
The Master Playbook: Convert Google Stitch to React Native Clean Code (2026)
The emergence of Google Stitch (Google Labs' AI-powered UI design tool) has completely transformed how we ideate products. However, the biggest bottleneck remains the Handoff phase: How do you smoothly convert Google Stitch to React Native without turning your mobile app into a chaotic mess of spaghetti code?
This article will guide you through connecting your AI-native design workflow with a mobile source code compiler, allowing you to extract clean, highly optimized React Native code that strictly follows Flexbox principles.
Table of Contents
1. The Era of AI Design: The Google Stitch Advantage
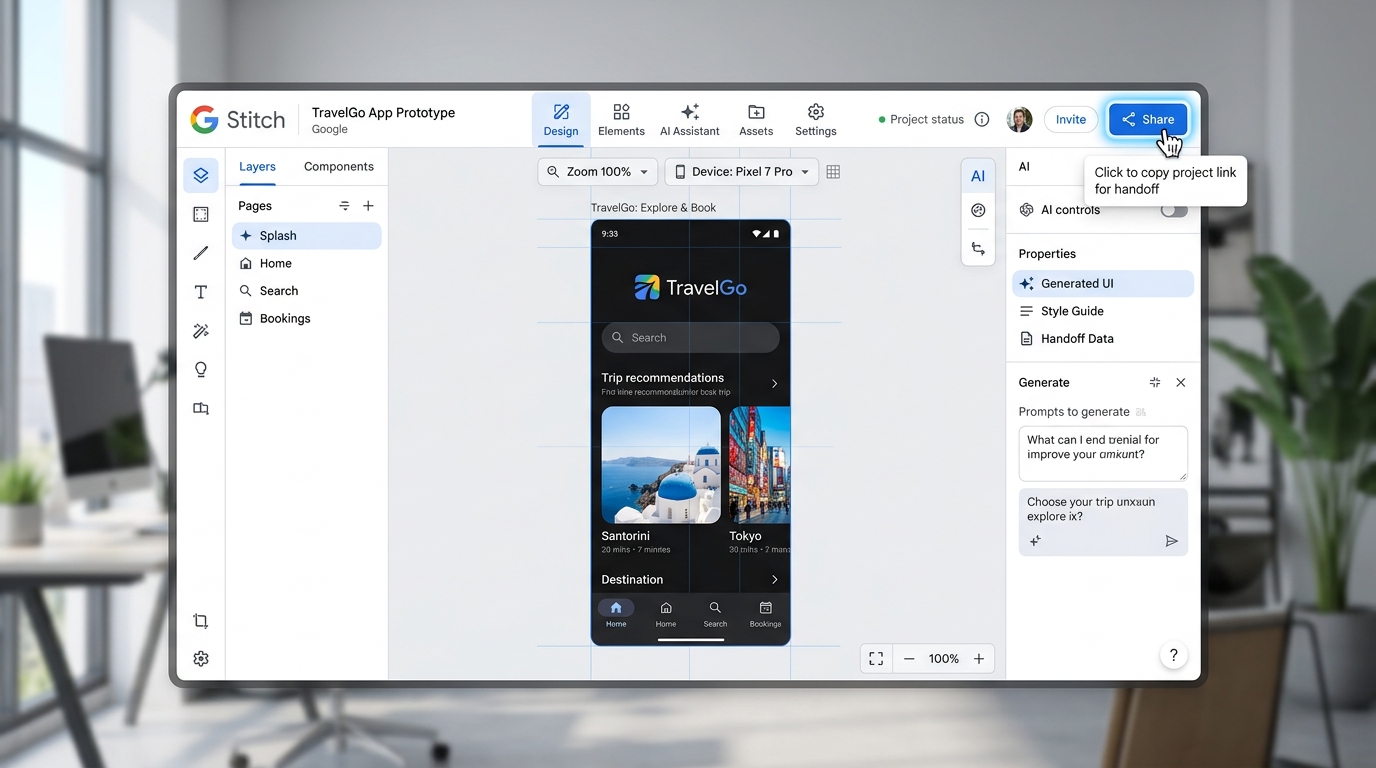
Powered by the robust Gemini model, Google Stitch allows you to generate detailed user interfaces simply by entering text (Text-to-UI) or uploading a hand-drawn sketch (Sketch-to-UI).
- Rapid Prototyping: Turn raw ideas into high-fidelity UIs in mere seconds.
- AI-Native Canvas: Leverage conversational interactions to naturally tweak layouts, typography, and colors on the fly.
However, crafting a beautiful design on a canvas is only half the battle.
2. The Challenge of Mobile Handoff for React Native
Although Google Stitch supports exporting to HTML/CSS or syncing to intermediate tools, directly utilizing these outputs for mobile development (React Native) often hits critical roadblocks:
- Disconnected Layout Systems: Web relies on CSS Grid and Floats, whereas React Native is strictly bound to the Flexbox architecture.
- Broken Responsiveness: Auto-generated code frequently uses hardcoded absolute positioning, causing the UI to shatter across varying iOS and Android screen sizes.
- Code Bloat (Junk Code): Empty layers or redundant bounding boxes in AI designs often result in "div-soup"—an excessive nesting of
<View>tags that severely degrades app performance.
3. The Solution: From Text-to-UI to Ready-to-Use Code
This is where CodeTea truly shines. Instead of manually measuring pixels from your Google Stitch drafts, CodeTea’s spatial analysis algorithm takes over. The system automatically performs Tree Shaking to merge redundant layers and recompiles static coordinates into accurate justifyContent, alignItems, and flexDirection properties. The result is minimalist, production-ready code that looks just like it was authored by a Senior Mobile Developer.
4. Step-by-Step Guide: Export Screen Source Code
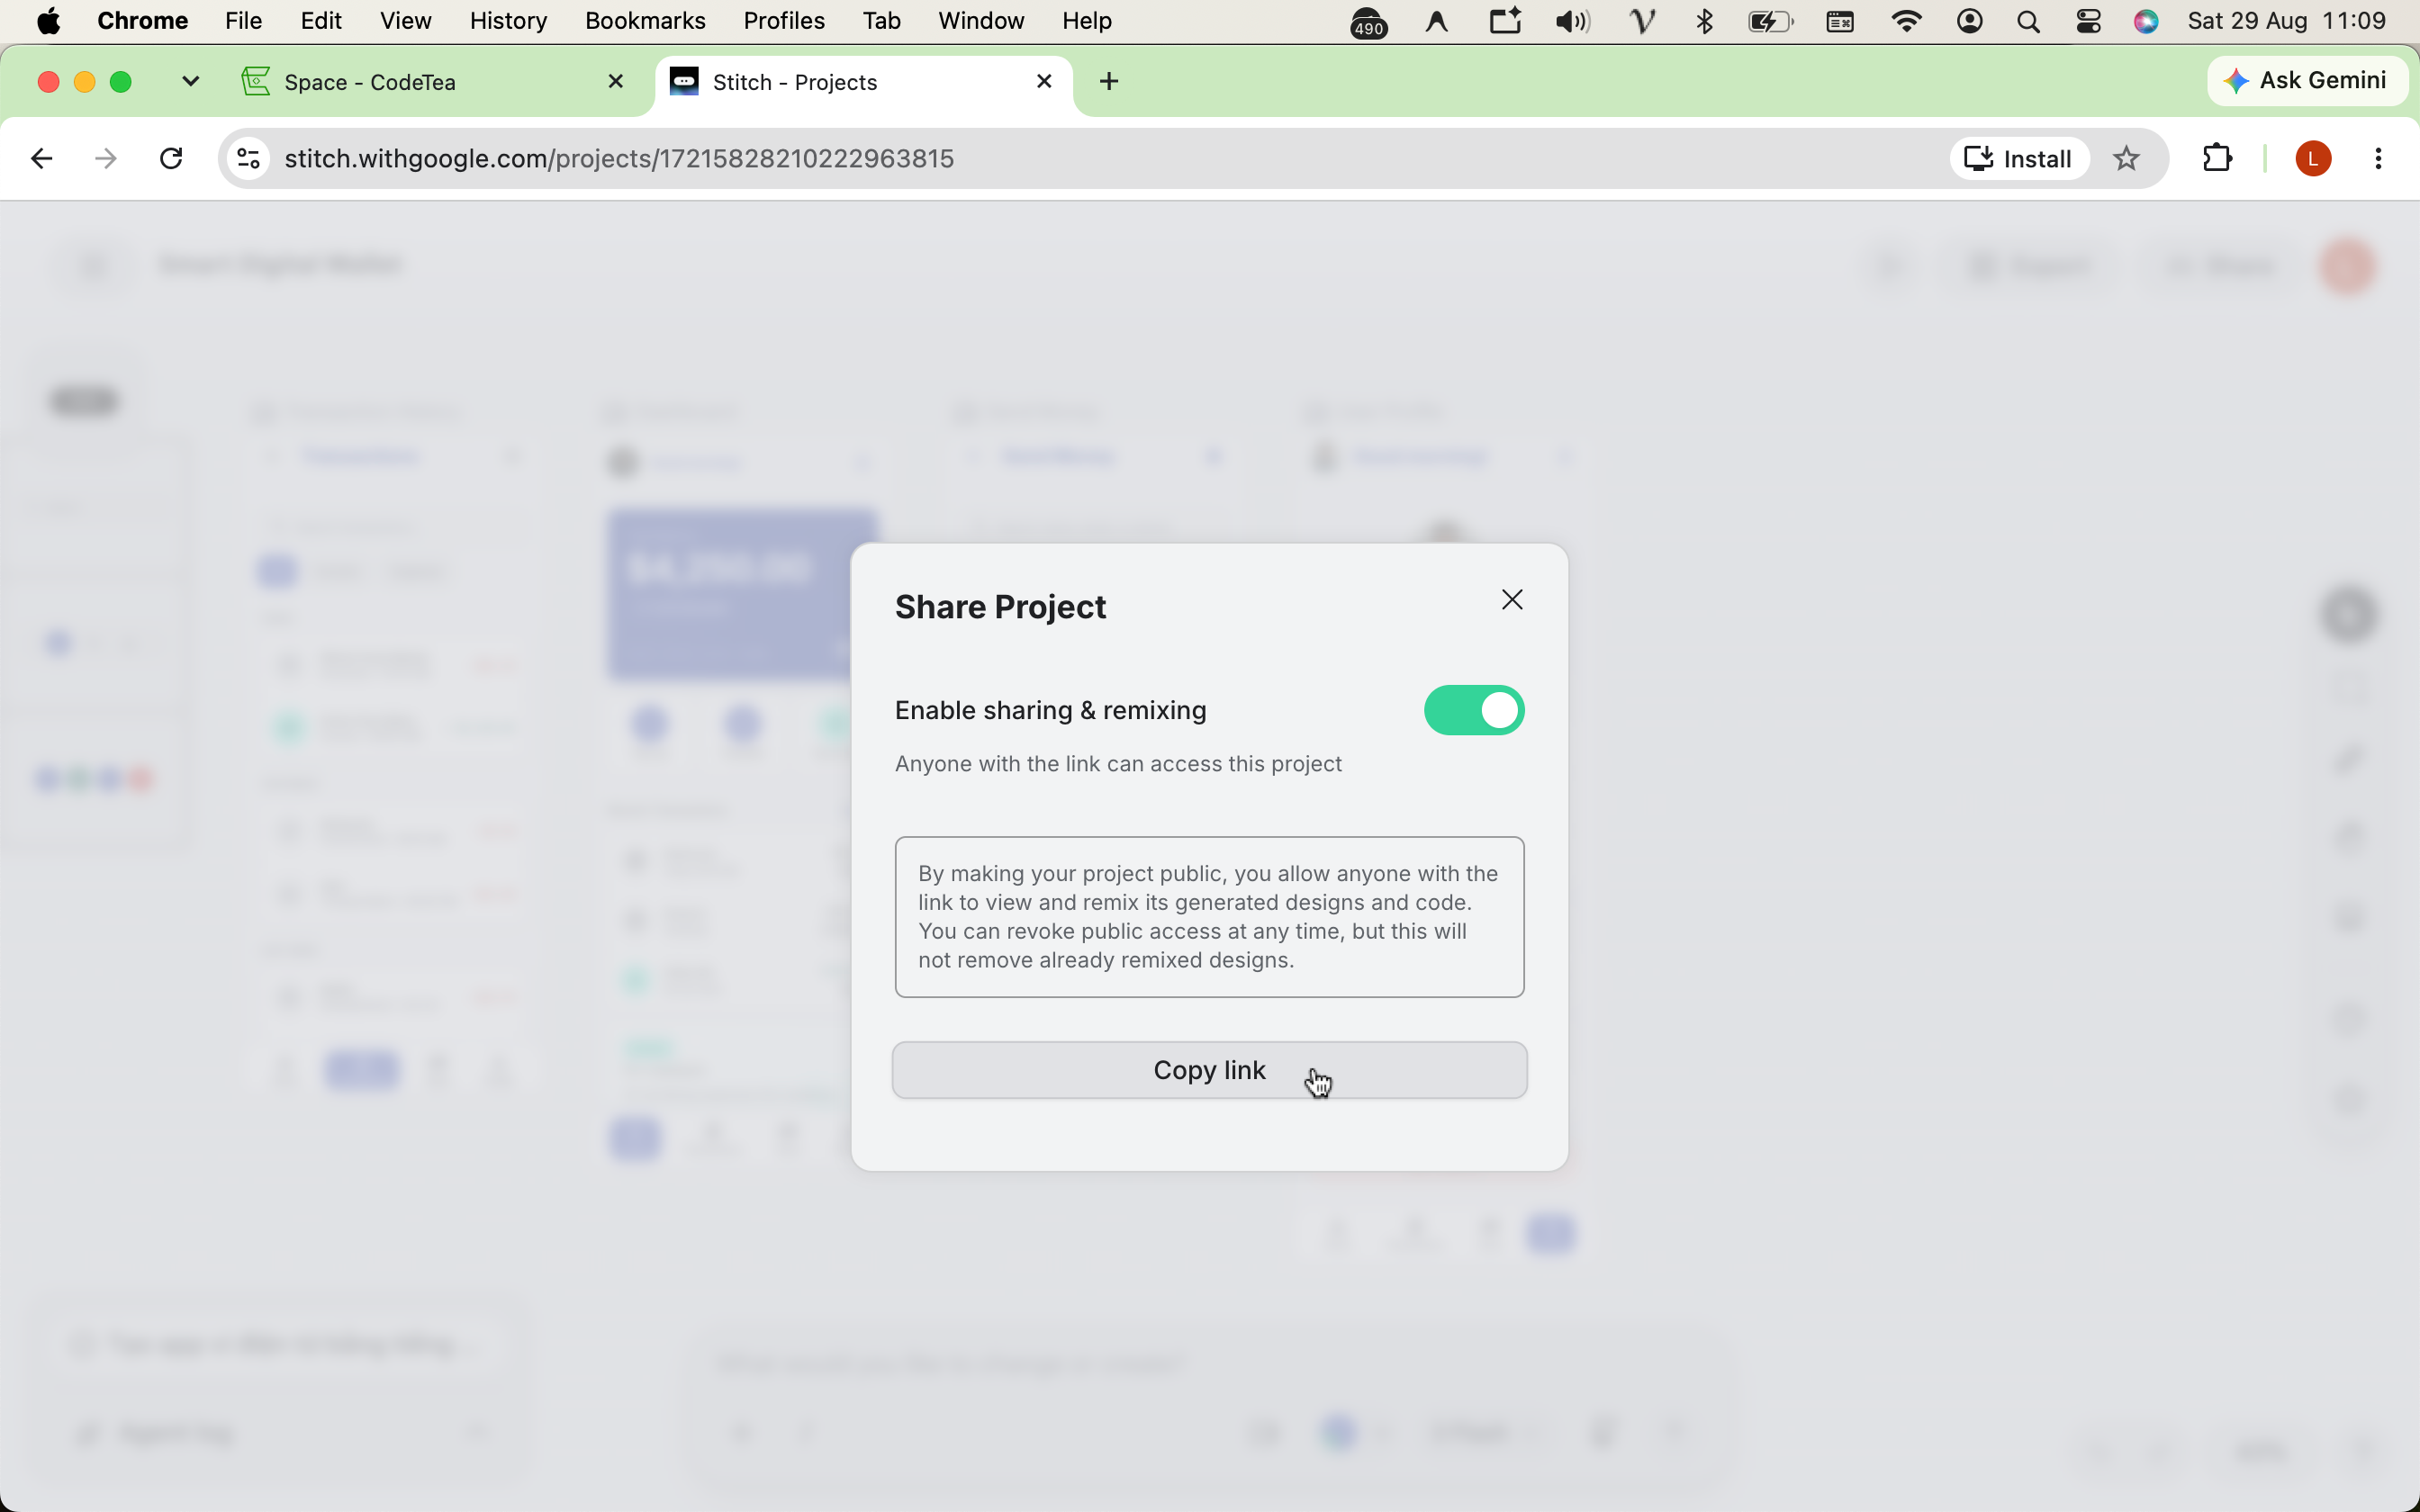
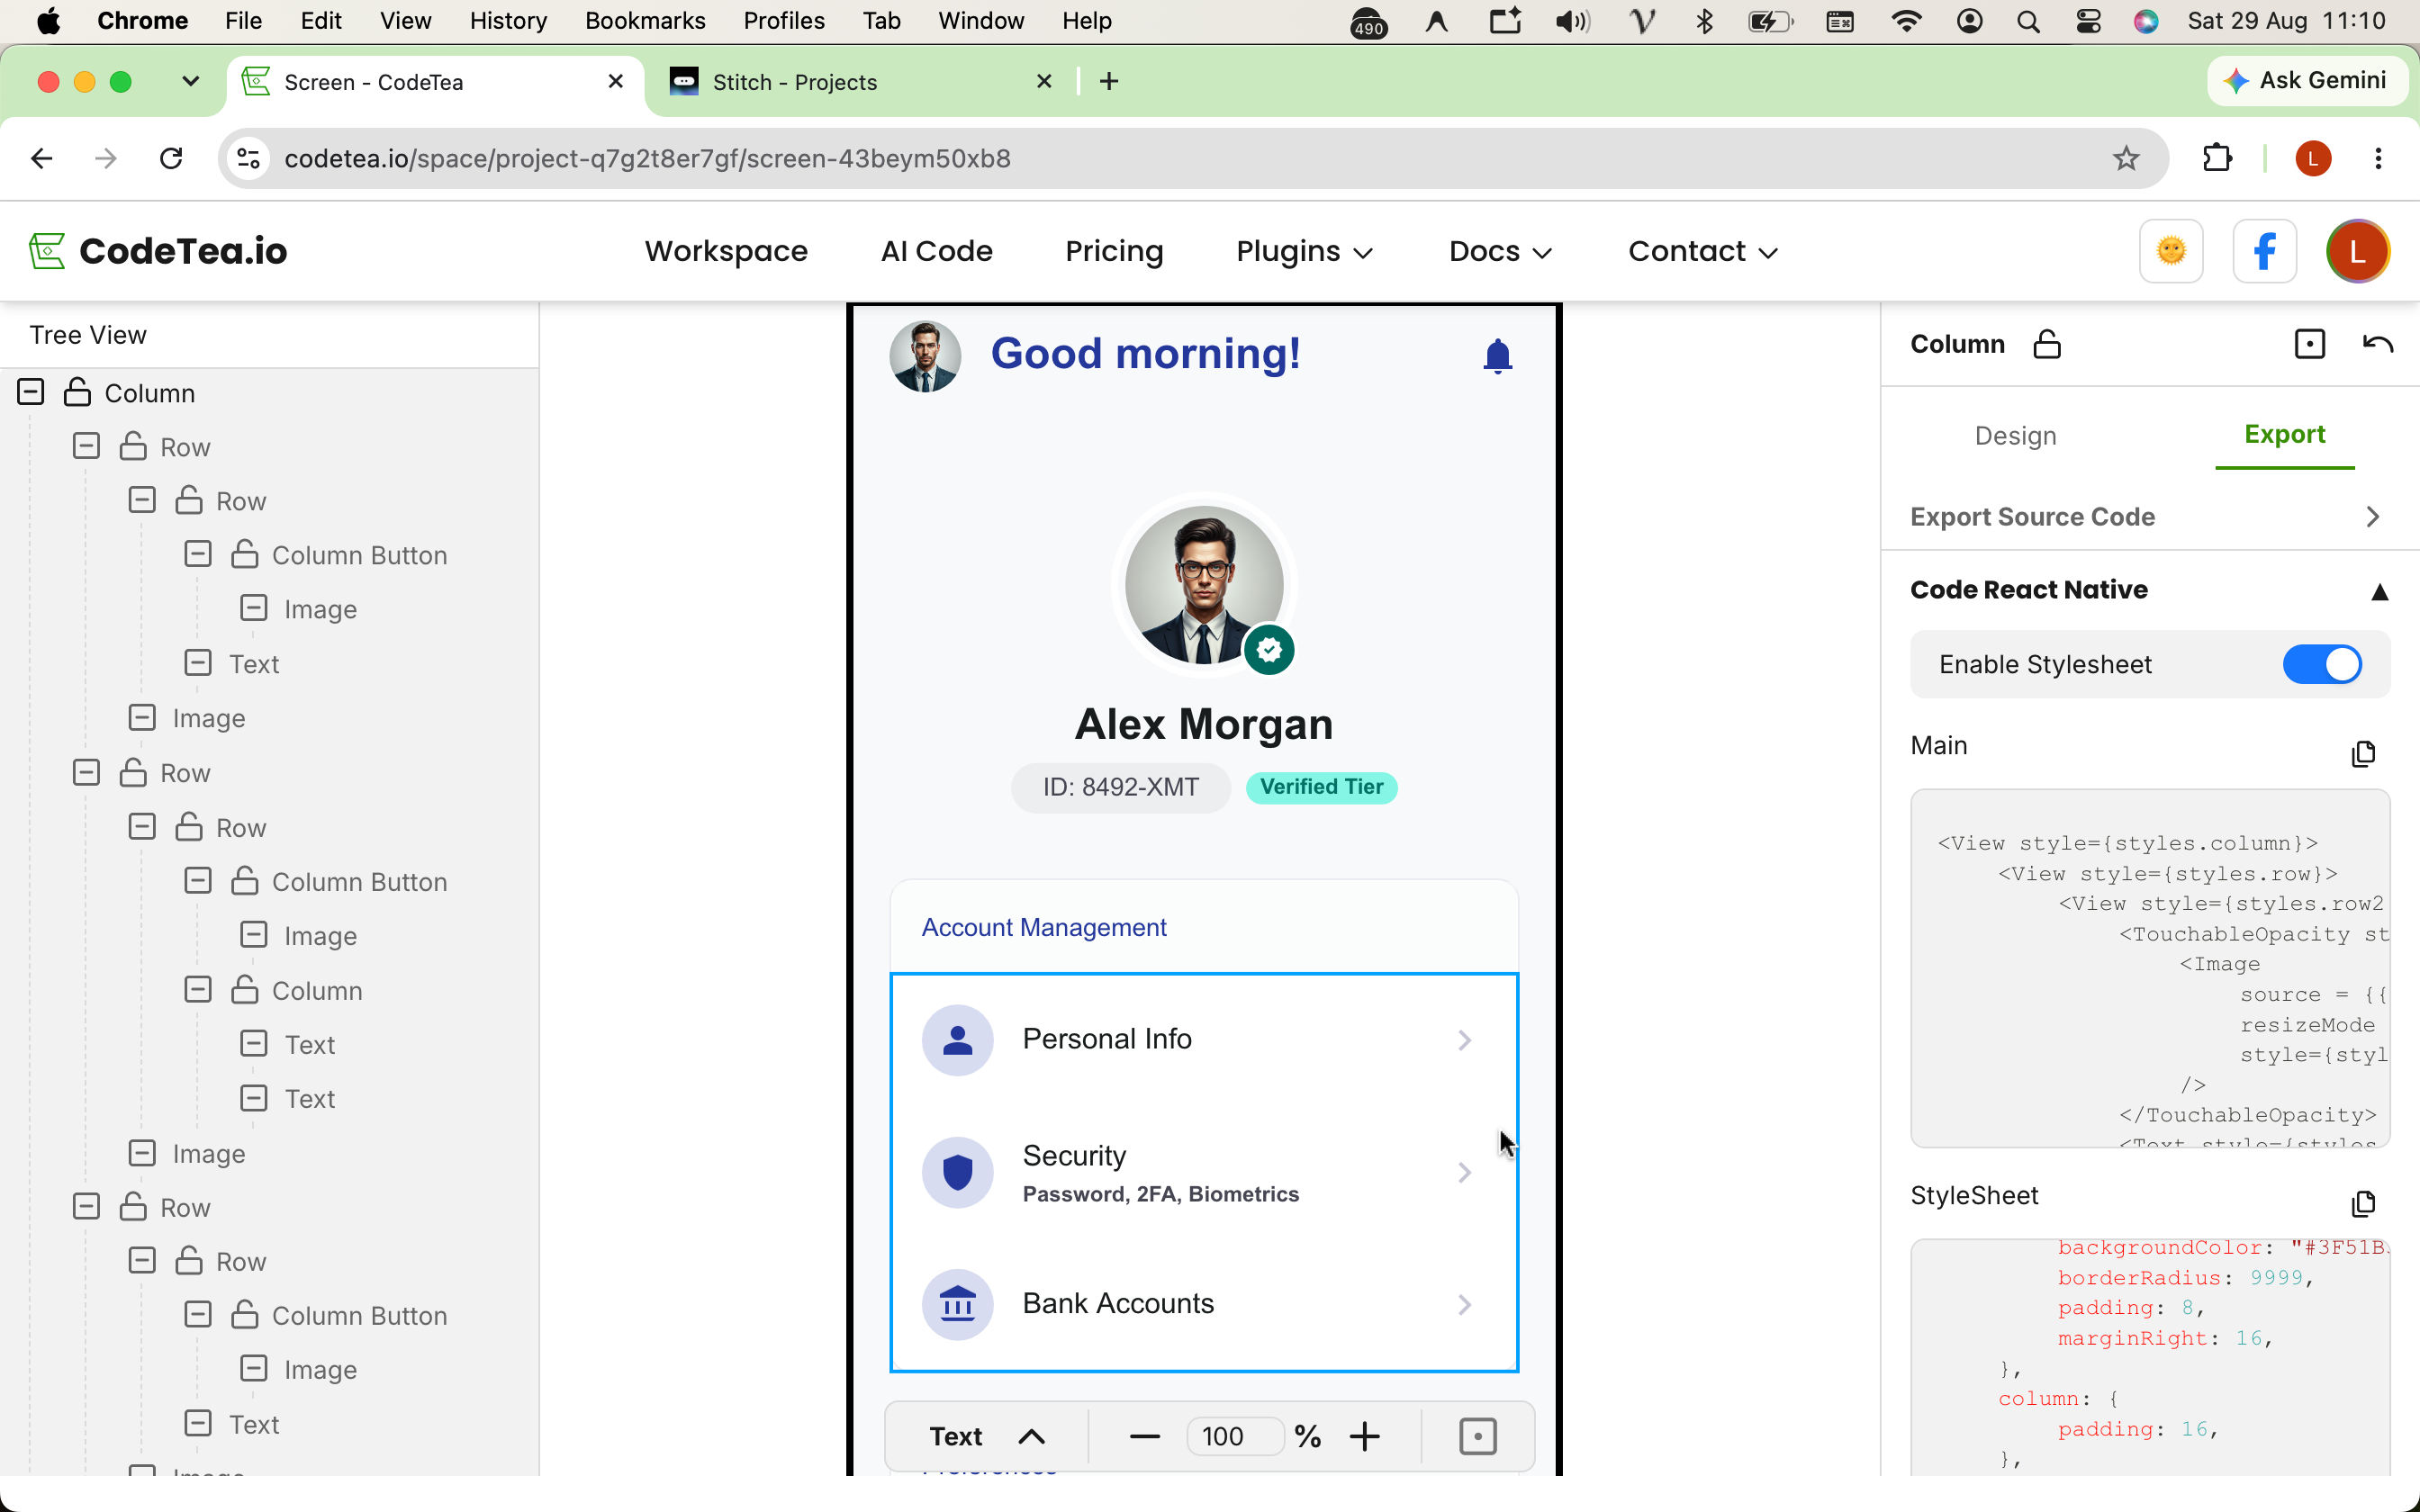
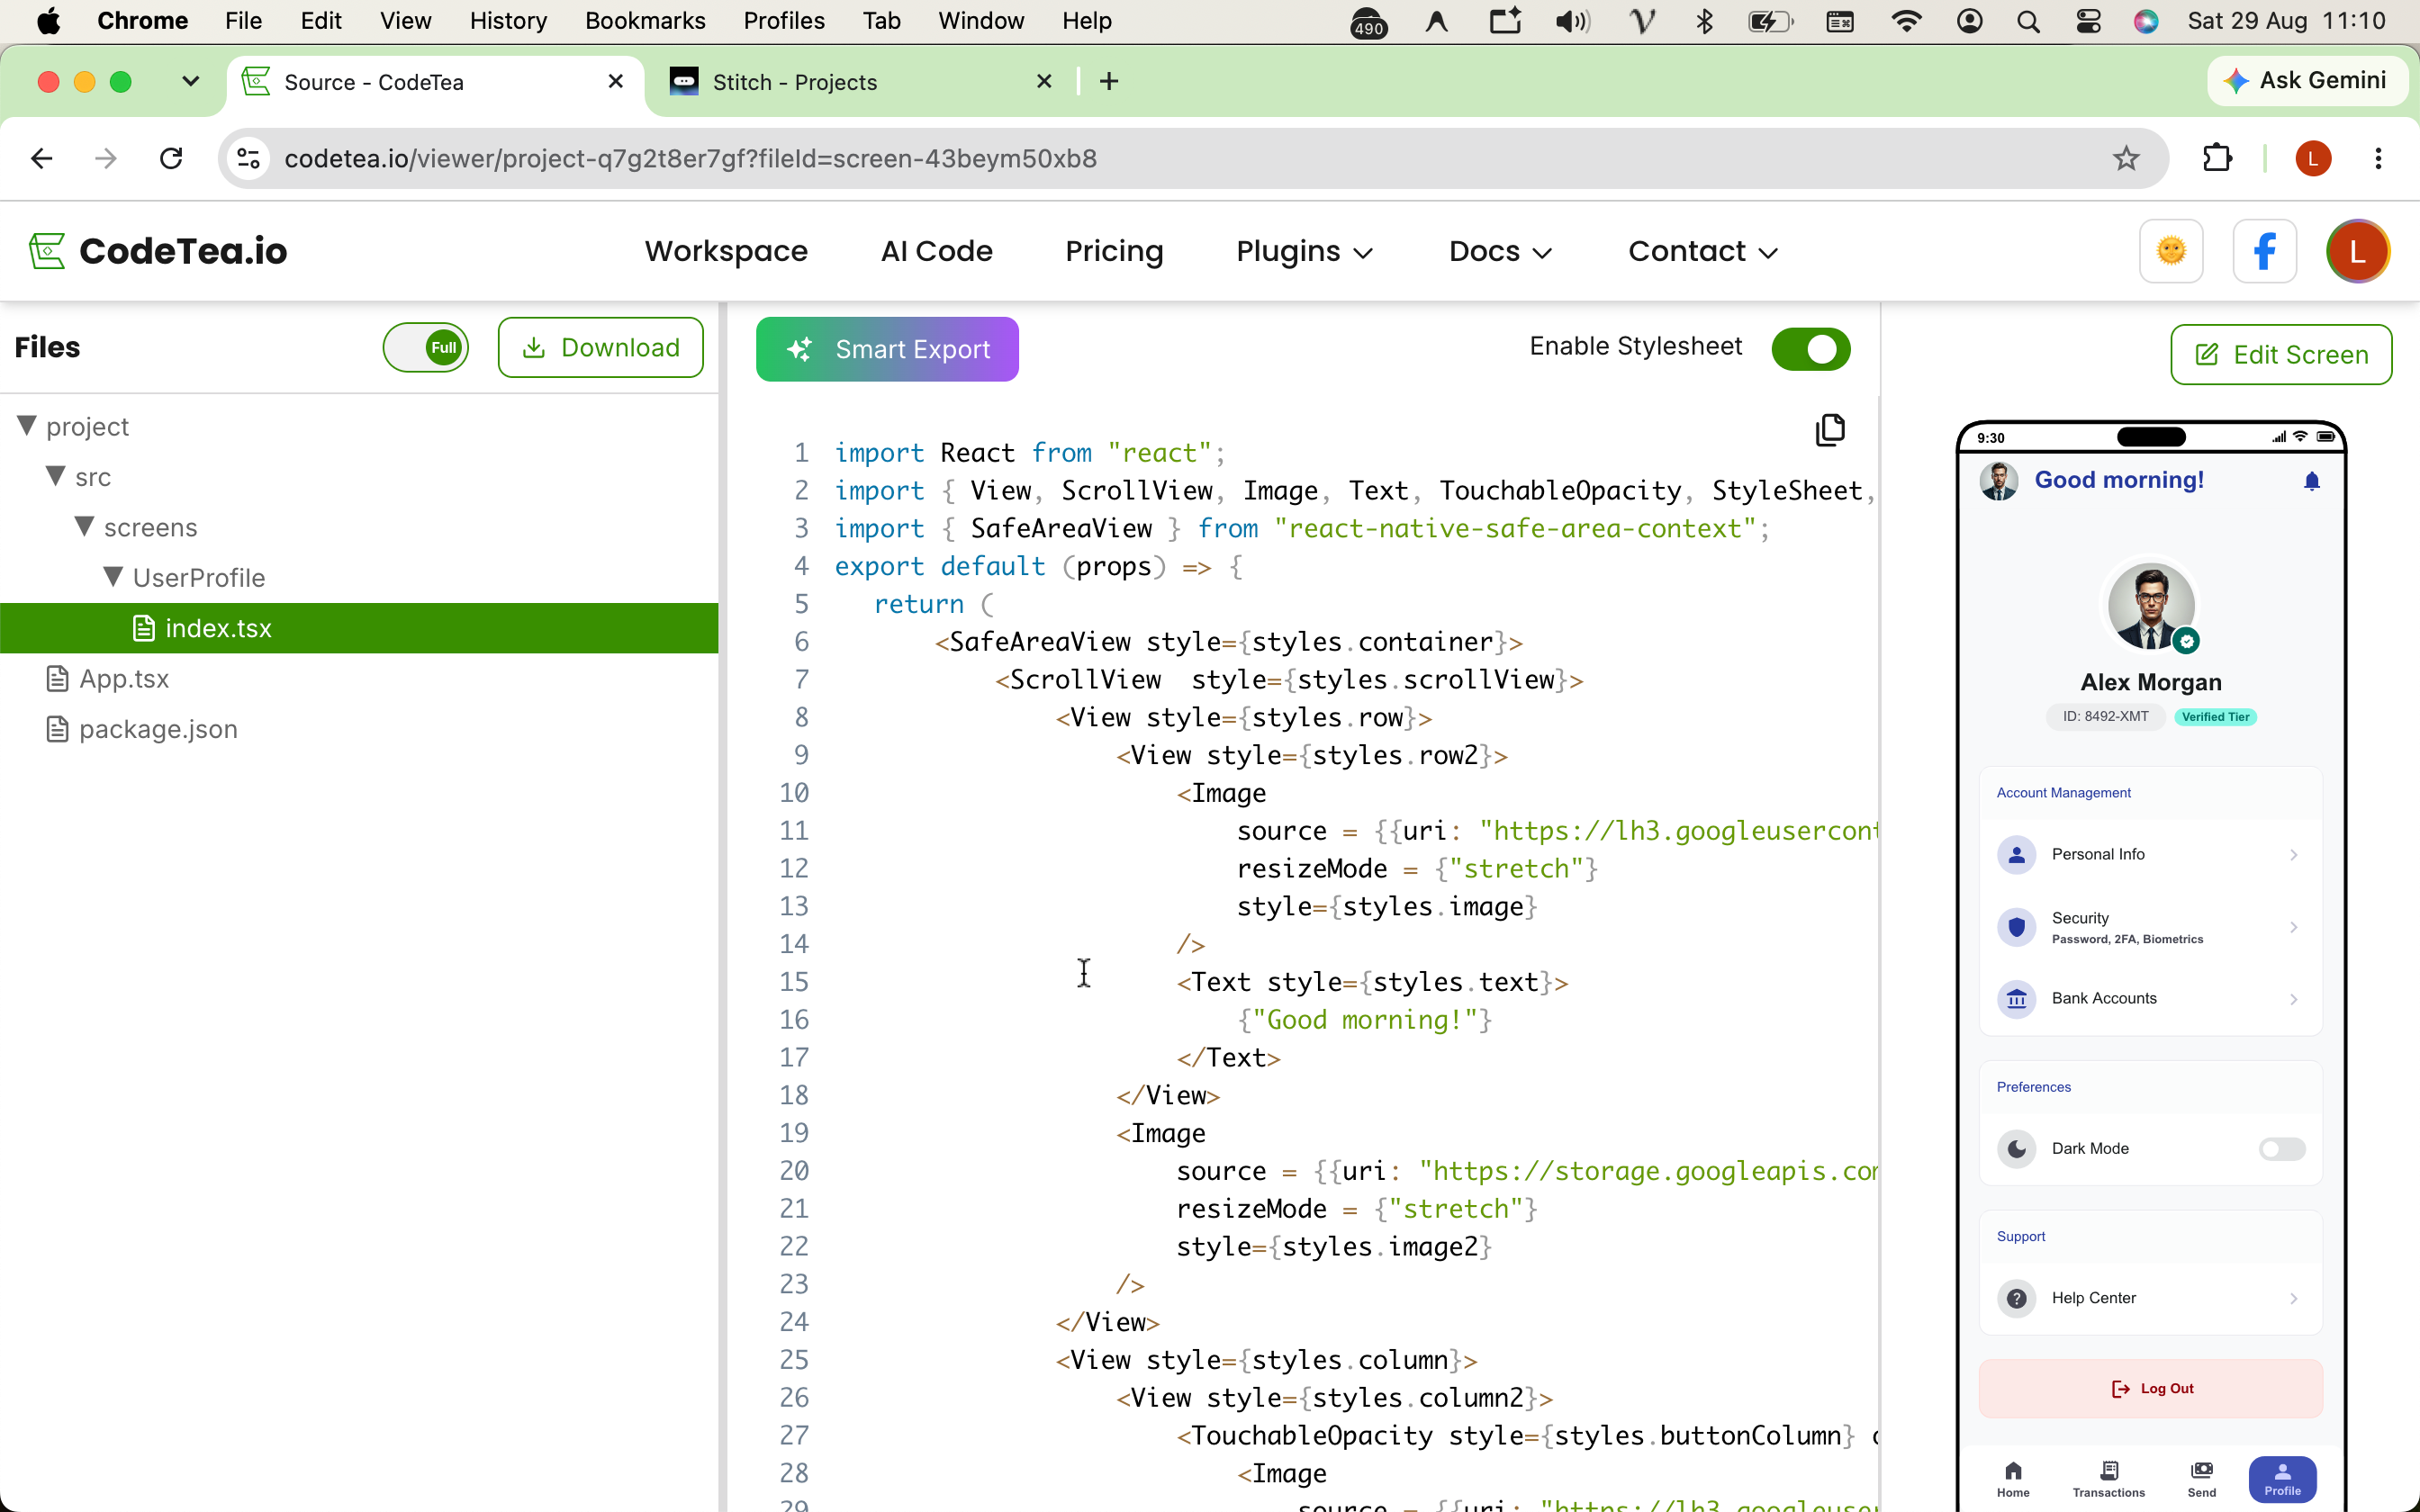
Step 1: After finalizing your AI-generated UI on Google Stitch, click the Share button to copy your project link.
- Step 1: Get the Google Stitch link: After finalizing your AI-generated UI on Google Stitch, click the Share button to copy your project link.
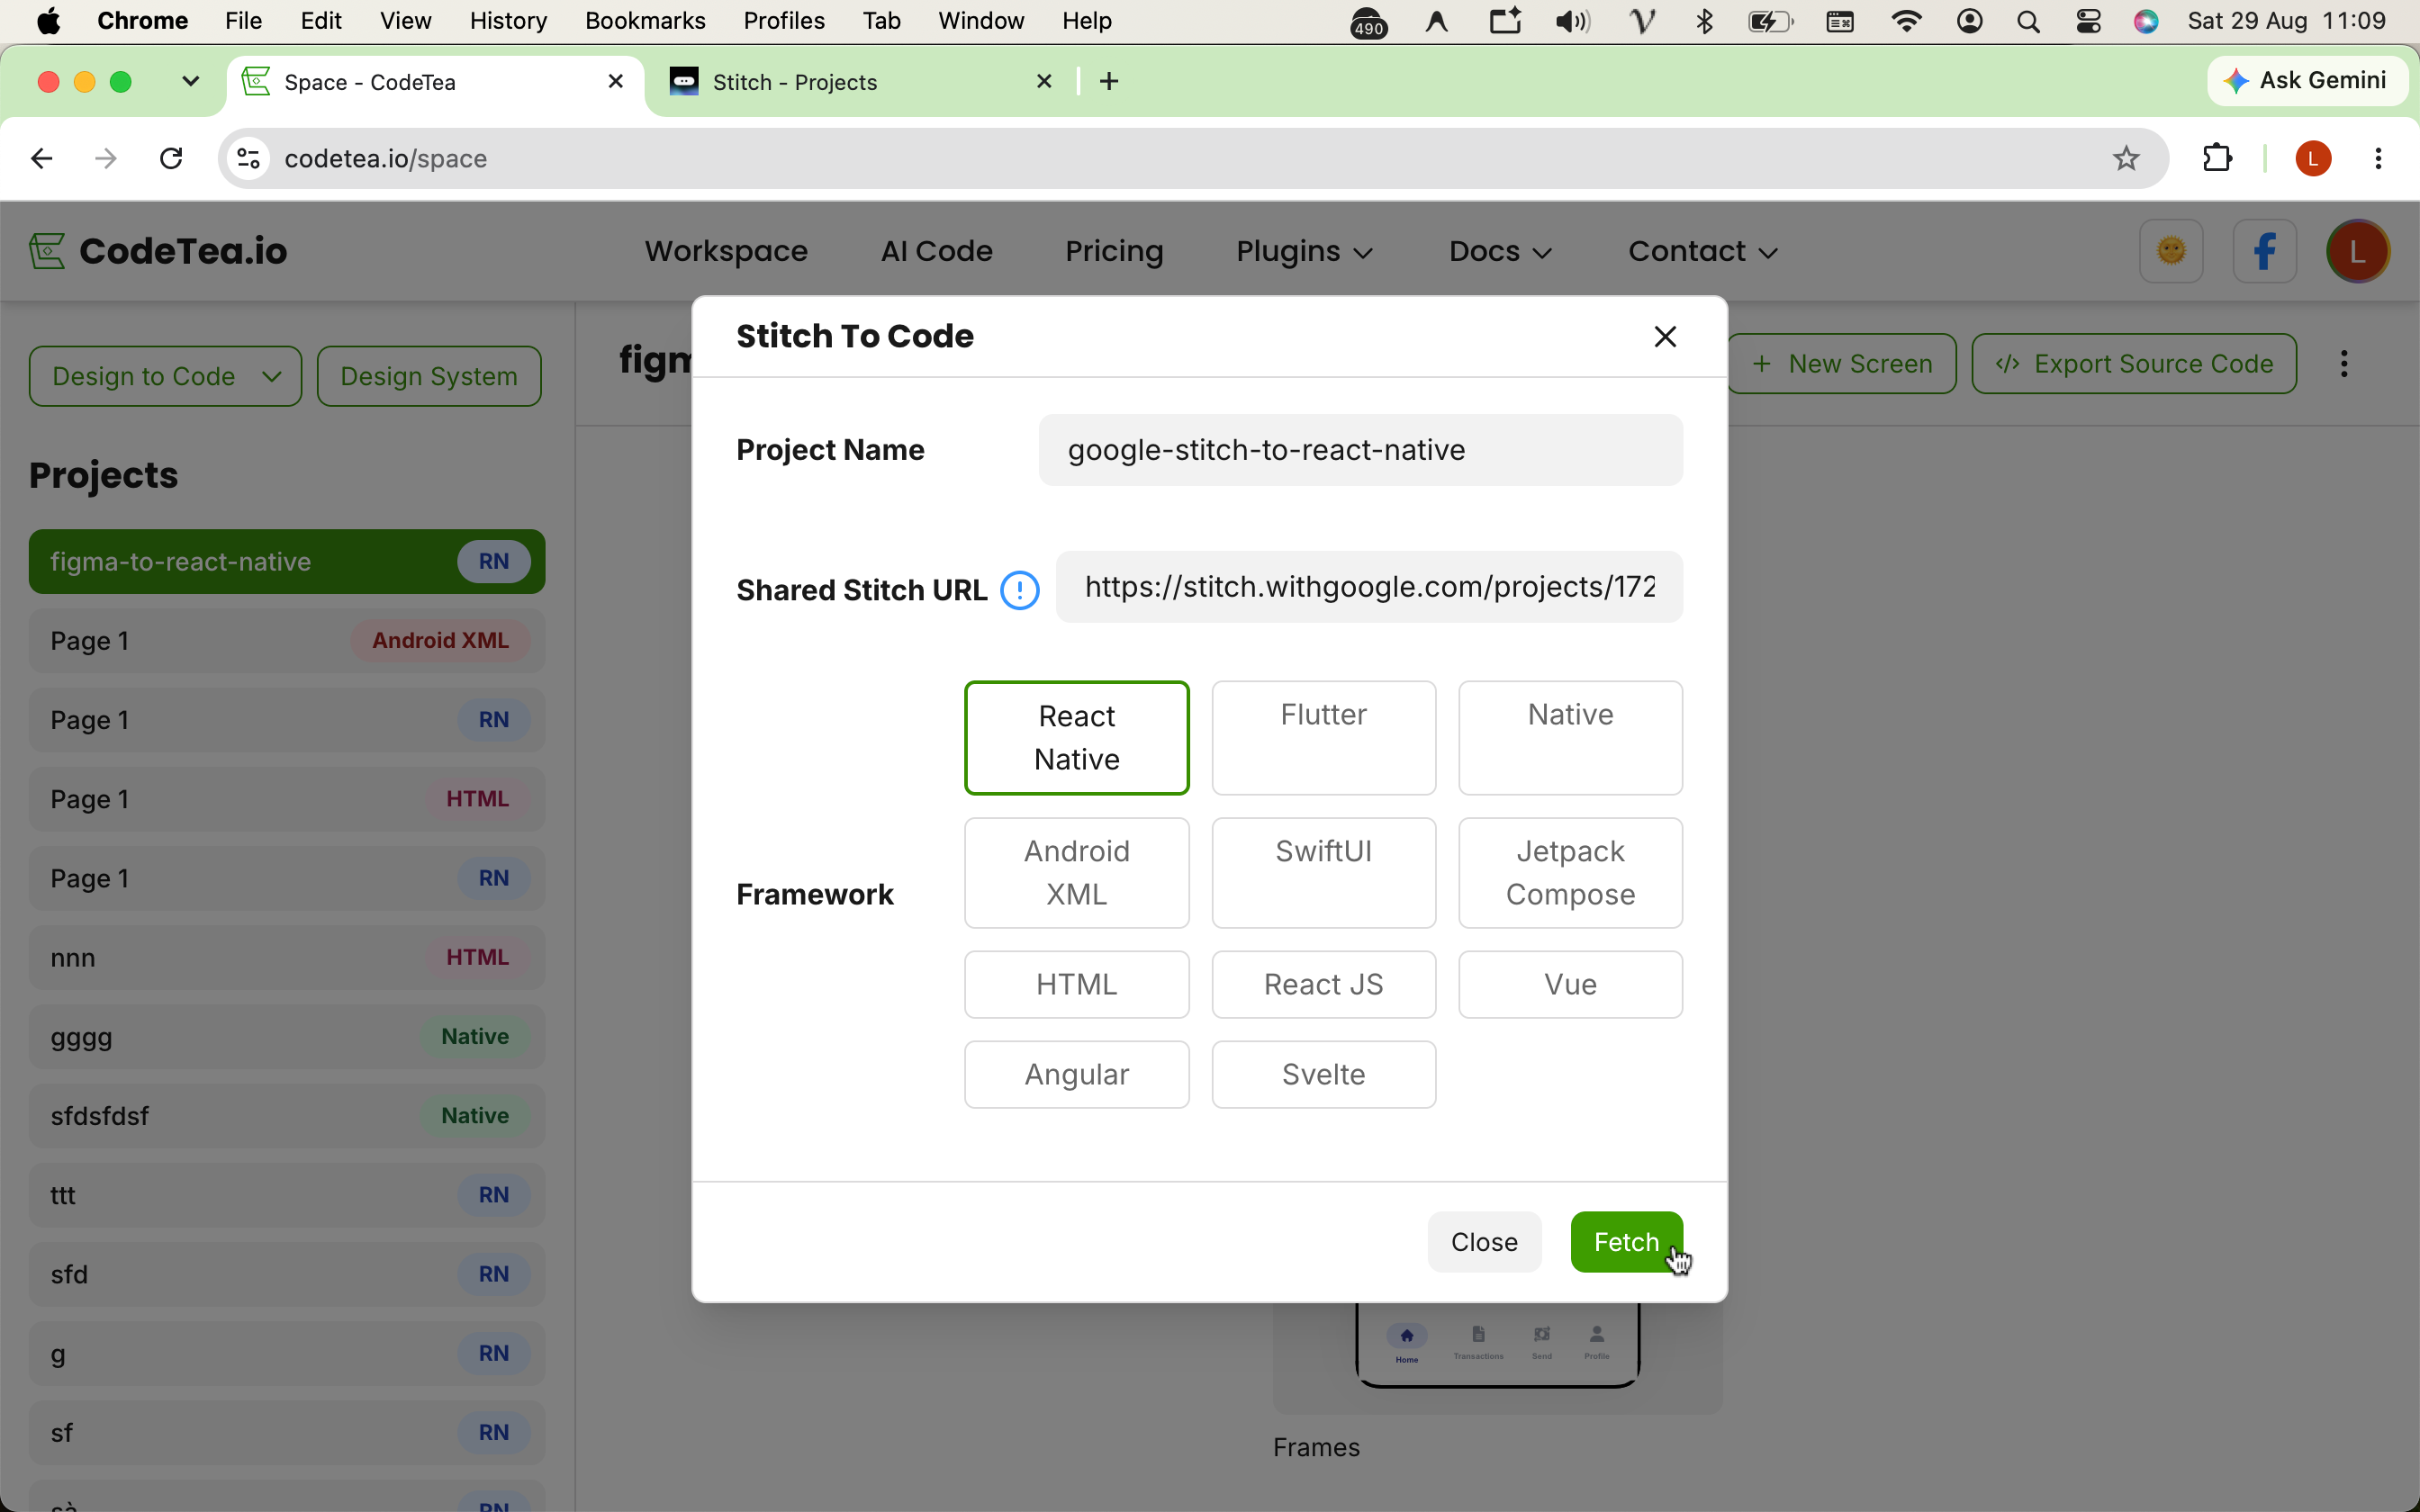
- Step 2: Initialize in the system: Enter your project name, paste the copied link into the platform, select React Native as the target framework, and click Fetch.
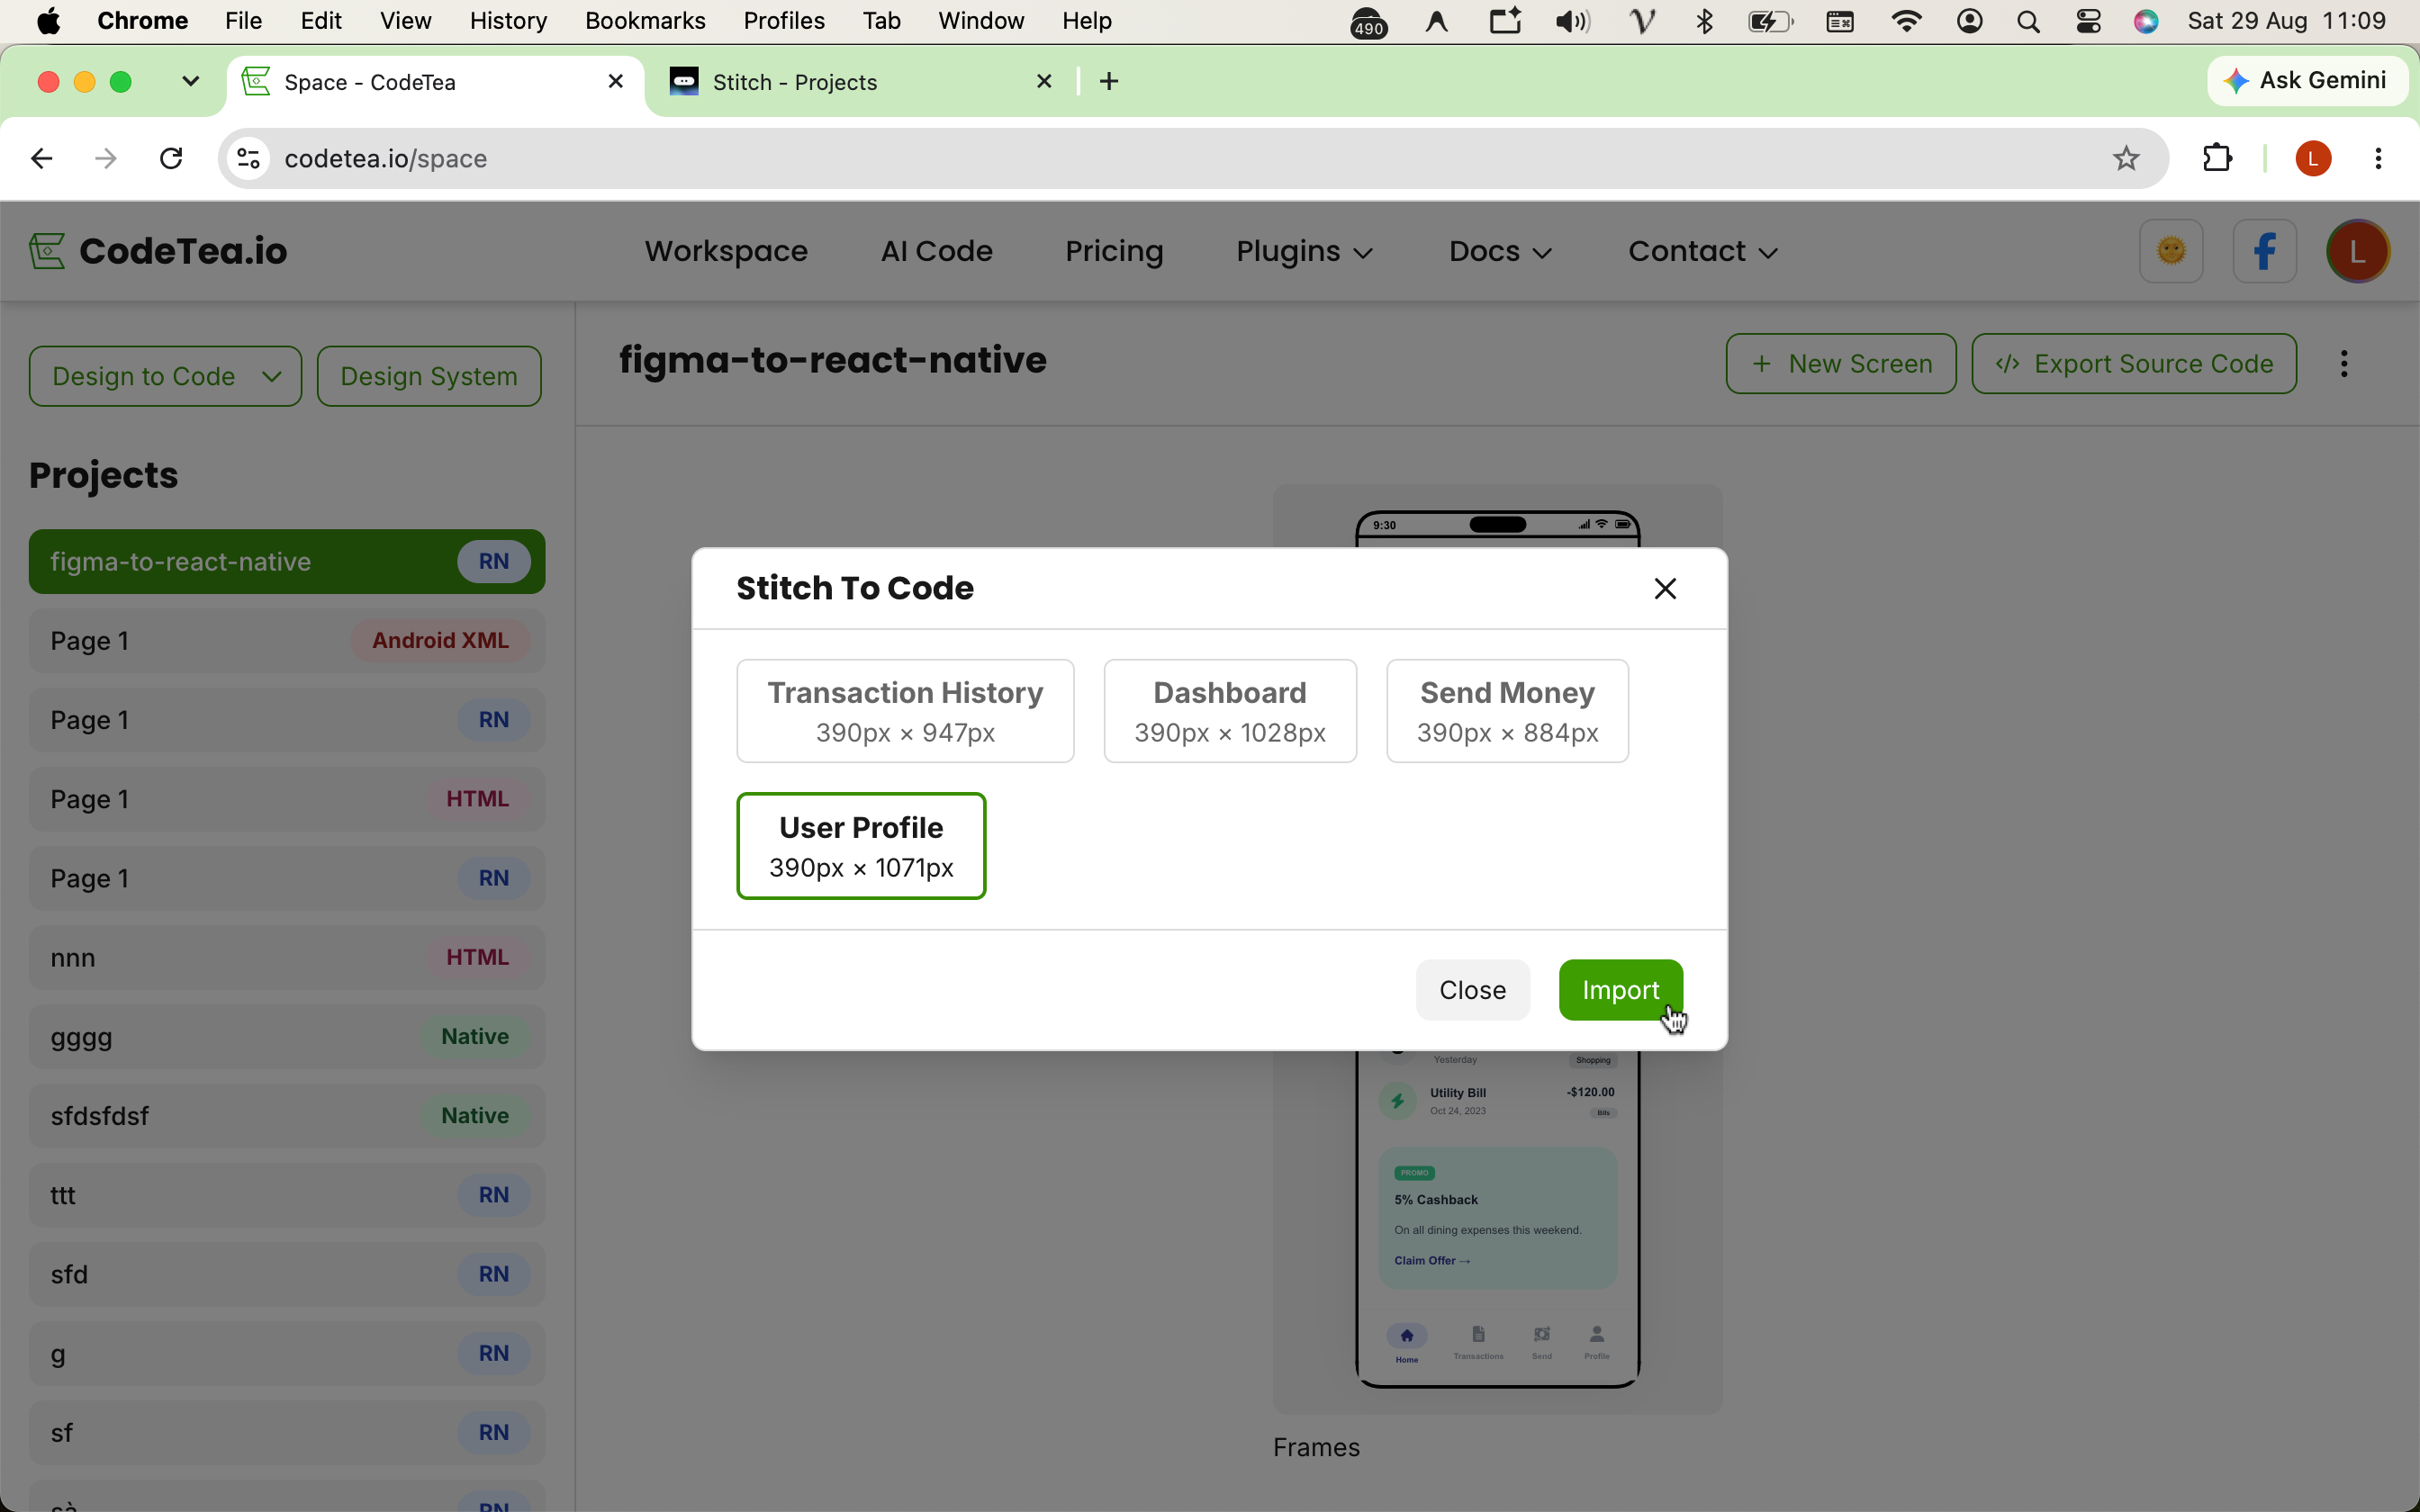
- Step 3: Select the target Screen: Wait for the AI data processing to complete, then select the specific Frame (screen) you wish to convert.
- Step 4: Extract Individual Components: Easily click on any element on the interface to preview its isolated React Native code snippet.
- Step 5: Export the Entire Screen: With just one click, export the entire screen into fully functional React Native source code, optimized flawlessly with Flexbox.
import React from 'react';
import { View, Text, Image, ScrollView, StyleSheet } from 'react-native';

// Code generated from Google Stitch AI Design via CodeTea
export const StitchGeneratedScreen = () => {
    return (
        <ScrollView style={styles.container}>
            <View style={styles.headerCard}>
                <Text style={styles.heading}>Designed via Google Stitch</Text>
            </View>
            <View style={styles.body}>
                <Image source={{ uri: 'https://codetea.io/ai-mockup.png' }} style={styles.mockupImage} />
                <Text style={styles.subtitle}>Standardized source code, blistering speed</Text>
            </View>
        </ScrollView>
    );
};

const styles = StyleSheet.create({
    container: {
        flex: 1,
        backgroundColor: '#F3F4F6',
    },
    headerCard: {
        padding: 20,
        marginTop: 40,
        backgroundColor: '#FFFFFF',
        borderRadius: 16,
        shadowColor: '#000',
        shadowOpacity: 0.1,
        shadowRadius: 10,
    },
    heading: {
        fontSize: 26,
        fontWeight: 'bold',
        color: '#1F2937',
    },
    // Flexbox Layout securely translated by AI...
});
5. Seamless Integration with Expo & React Native CLI
Whether you are building a lightweight app within the Expo environment or require granular Native Module configurations using the React Native CLI, the extracted code is immediately plug-and-play. The output is purely Plain React Native, completely free from the burden of bloated, proprietary libraries.
6. Frequently Asked Questions (FAQ)
What is Google Stitch and why should I use it?
Google Stitch is an AI-powered design tool from Google Labs that generates UIs from text prompts or sketches. It drastically accelerates the ideation phase before moving into development.
How can I export React Native code directly from Google Stitch?
Out of the box, Google Stitch typically exports HTML/CSS or Figma files. To get standard mobile React Native code, you can bridge the gap with conversion tools like CodeTea to translate the design structure into React Native's Flexbox system.
Is the generated source code responsive across multiple screens?
Yes. CodeTea analyzes the spatial design structure from Google Stitch to accurately apply Flexbox properties, ensuring your app scales elastically across all mobile screen sizes (iOS & Android).
7. Conclusion
The synergy between the hyper-speed UI generation capabilities of Google Stitch and the precision code extraction of tools like CodeTea is unlocking an unprecedented Mobile App (React Native) development workflow.
Ready to turbocharge your UI programming time?
Stop wasting time on manual slicing. Start importing your Google Stitch AI designs directly into pristine React Native code today.