
Ultimate Guide: Convert Figma to React Native Clean Code in 2026
Every mobile developer knows that turning a static design into actual source code is one of the most time-consuming tasks. The Figma to React Native conversion process often comes with numerous issues: manual pixel measurements, incorrect Flexbox alignment, and the nightmare of "div-soup" (junk code) when using poor-quality automated tools.
In this article, we will dive deep into optimizing the Handoff process, solving the junk code problem, and discovering how to extract clean code regardless of whether the design file is perfectly structured or not.
Table of Contents
- 1. The pain of traditional "Figma to React Native" workflows
- 2. A lifesaver for all Design files: Flawless handling of any Layout
- 3. Minimizing tag structure with Tree Shaking
- 4. Step-by-Step Guide: Export Screen Source Code
- 5. Perfect compatibility with Expo and React Native CLI
- 6. Real-world performance comparison table
- 7. Frequently Asked Questions (FAQ)
1. The pain of traditional "Figma to React Native" workflows
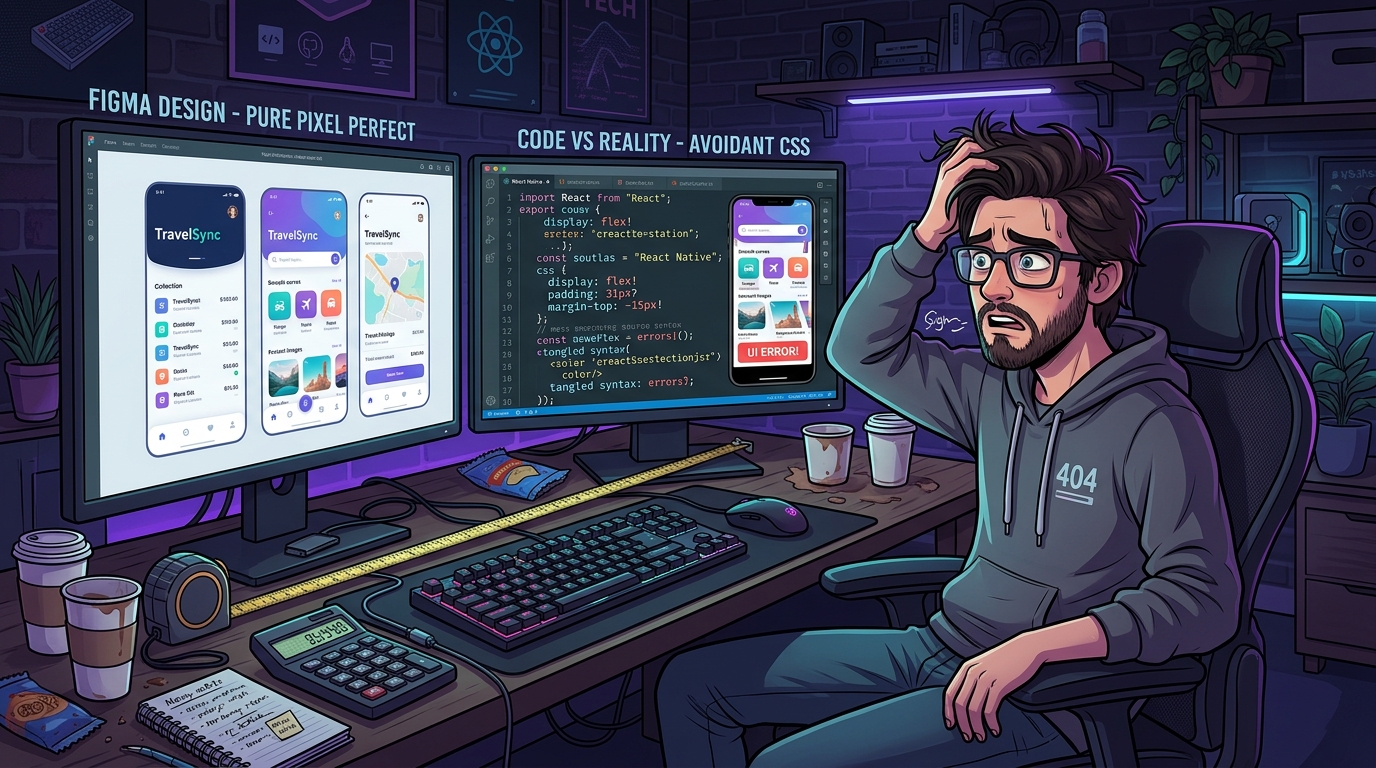
Before new generation automation tools emerged, the workflow between UI/UX Designers and Developers had critical bottlenecks:
- Resource waste: Continuously typing
padding,margin,colorintoStyleSheettakes up 30-40% of UI coding time. - Responsive misalignment: Figma uses static coordinates, while the React Native Flexbox system requires flexible elasticity to run on various Android and iOS screen sizes.
- Junk code from legacy tools: Many Figma to Code tools currently promise 1-click export but generate countless nested
<View>tags and use hardcoded coordinates (position: absolute). This code is practically impossible to reuse.
2. A lifesaver for all Design files: Flawless handling of both Auto Layout and Non-Auto Layout
One of a developer's biggest nightmares is receiving a "broken" Figma file, where Designers don't use Auto Layout but freely drag and drop elements on the screen (Freeform). Most tools on the market will give up, but CodeTea allows you to convert Figma without Auto Layout perfectly, acting as a flexible compiler of thought:
- For standard Auto Layout designs (Ideal Case): The system directly reads Figma's API, accurately translating the structure into Flexbox (
flexDirection: row | column,gap,padding). - For freeform designs (Non-Auto Layout): Even when Designers draw freely, the tool analyzes the spatial structure of layers. The system automatically calculates relative positions between elements to wrap them with appropriate tags, only using
position: absolutewhen truly necessary (like floating icons or badges).
The result is that whether the design file is disciplined or free-flowing, you still export accurate source code.
3. Minimizing tag structure with Tree Shaking
Designers often wrap multiple empty layers (Frames) to add background colors or create spacing. CodeTea's algorithm automatically merges these attributes into the nearest parent Component, completely cleaning up the "div-soup" phenomenon, delivering a minimalist tag structure and optimized rendering performance.
4. Step-by-Step Guide: Export Screen Source Code
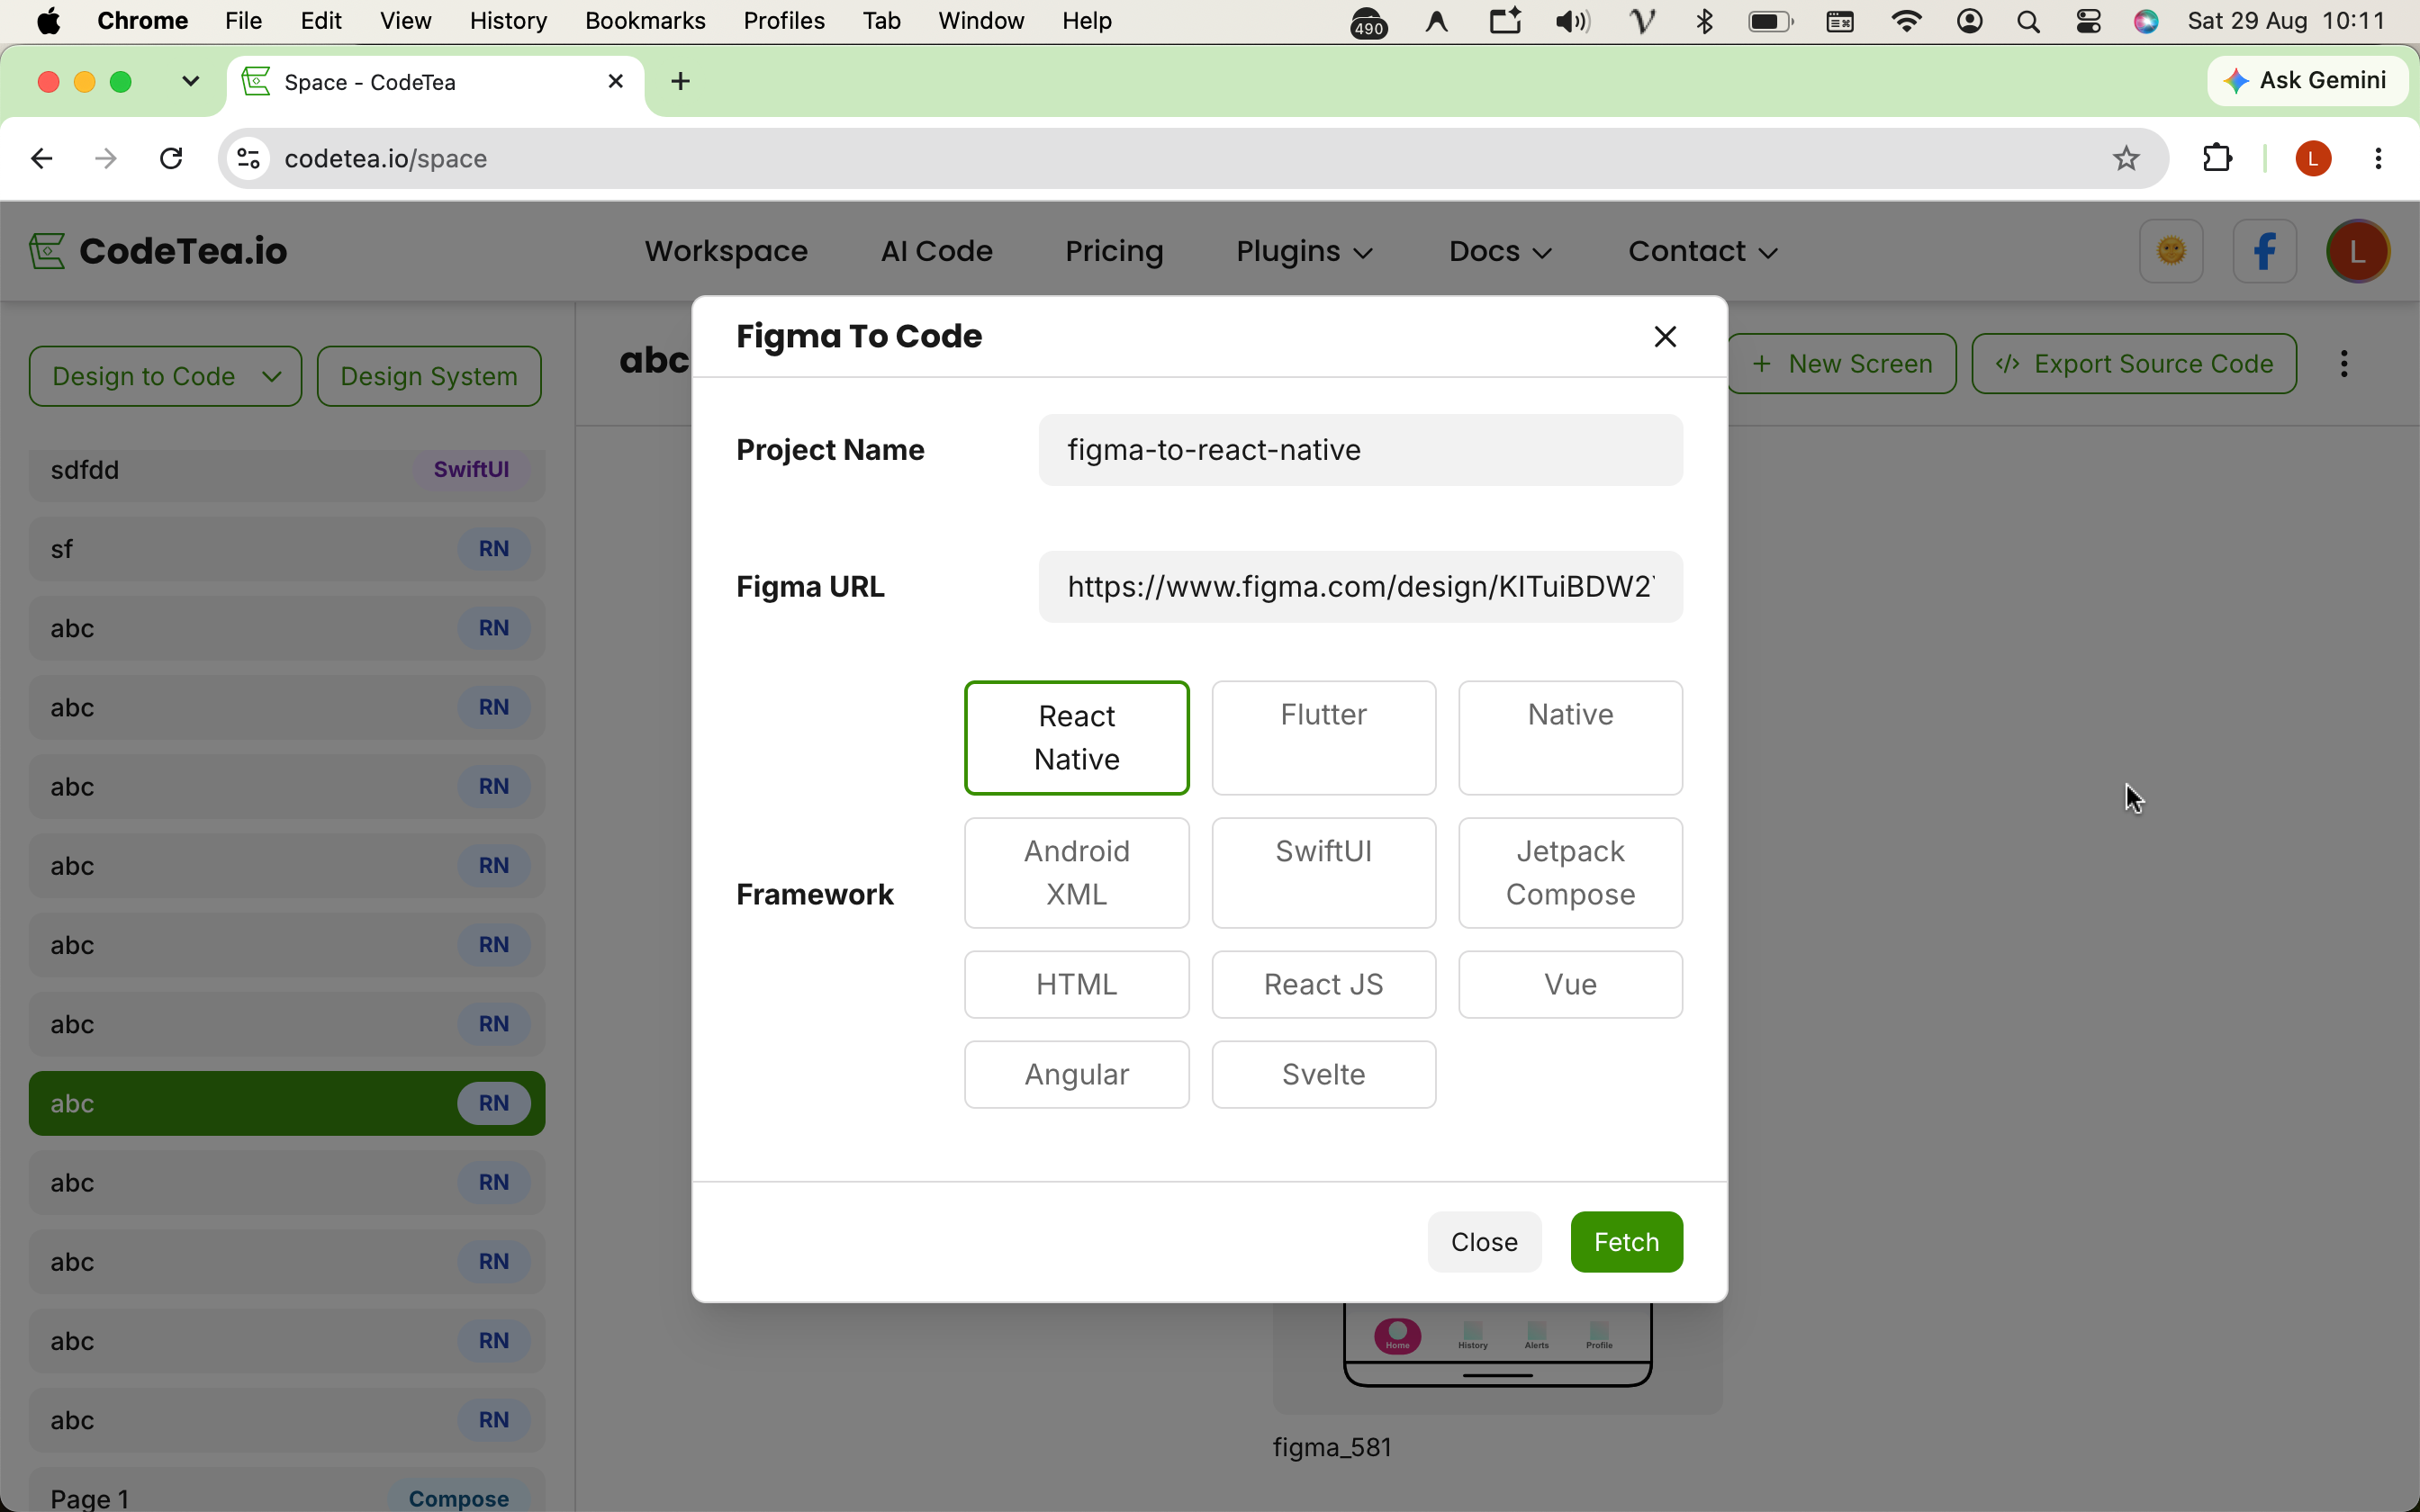
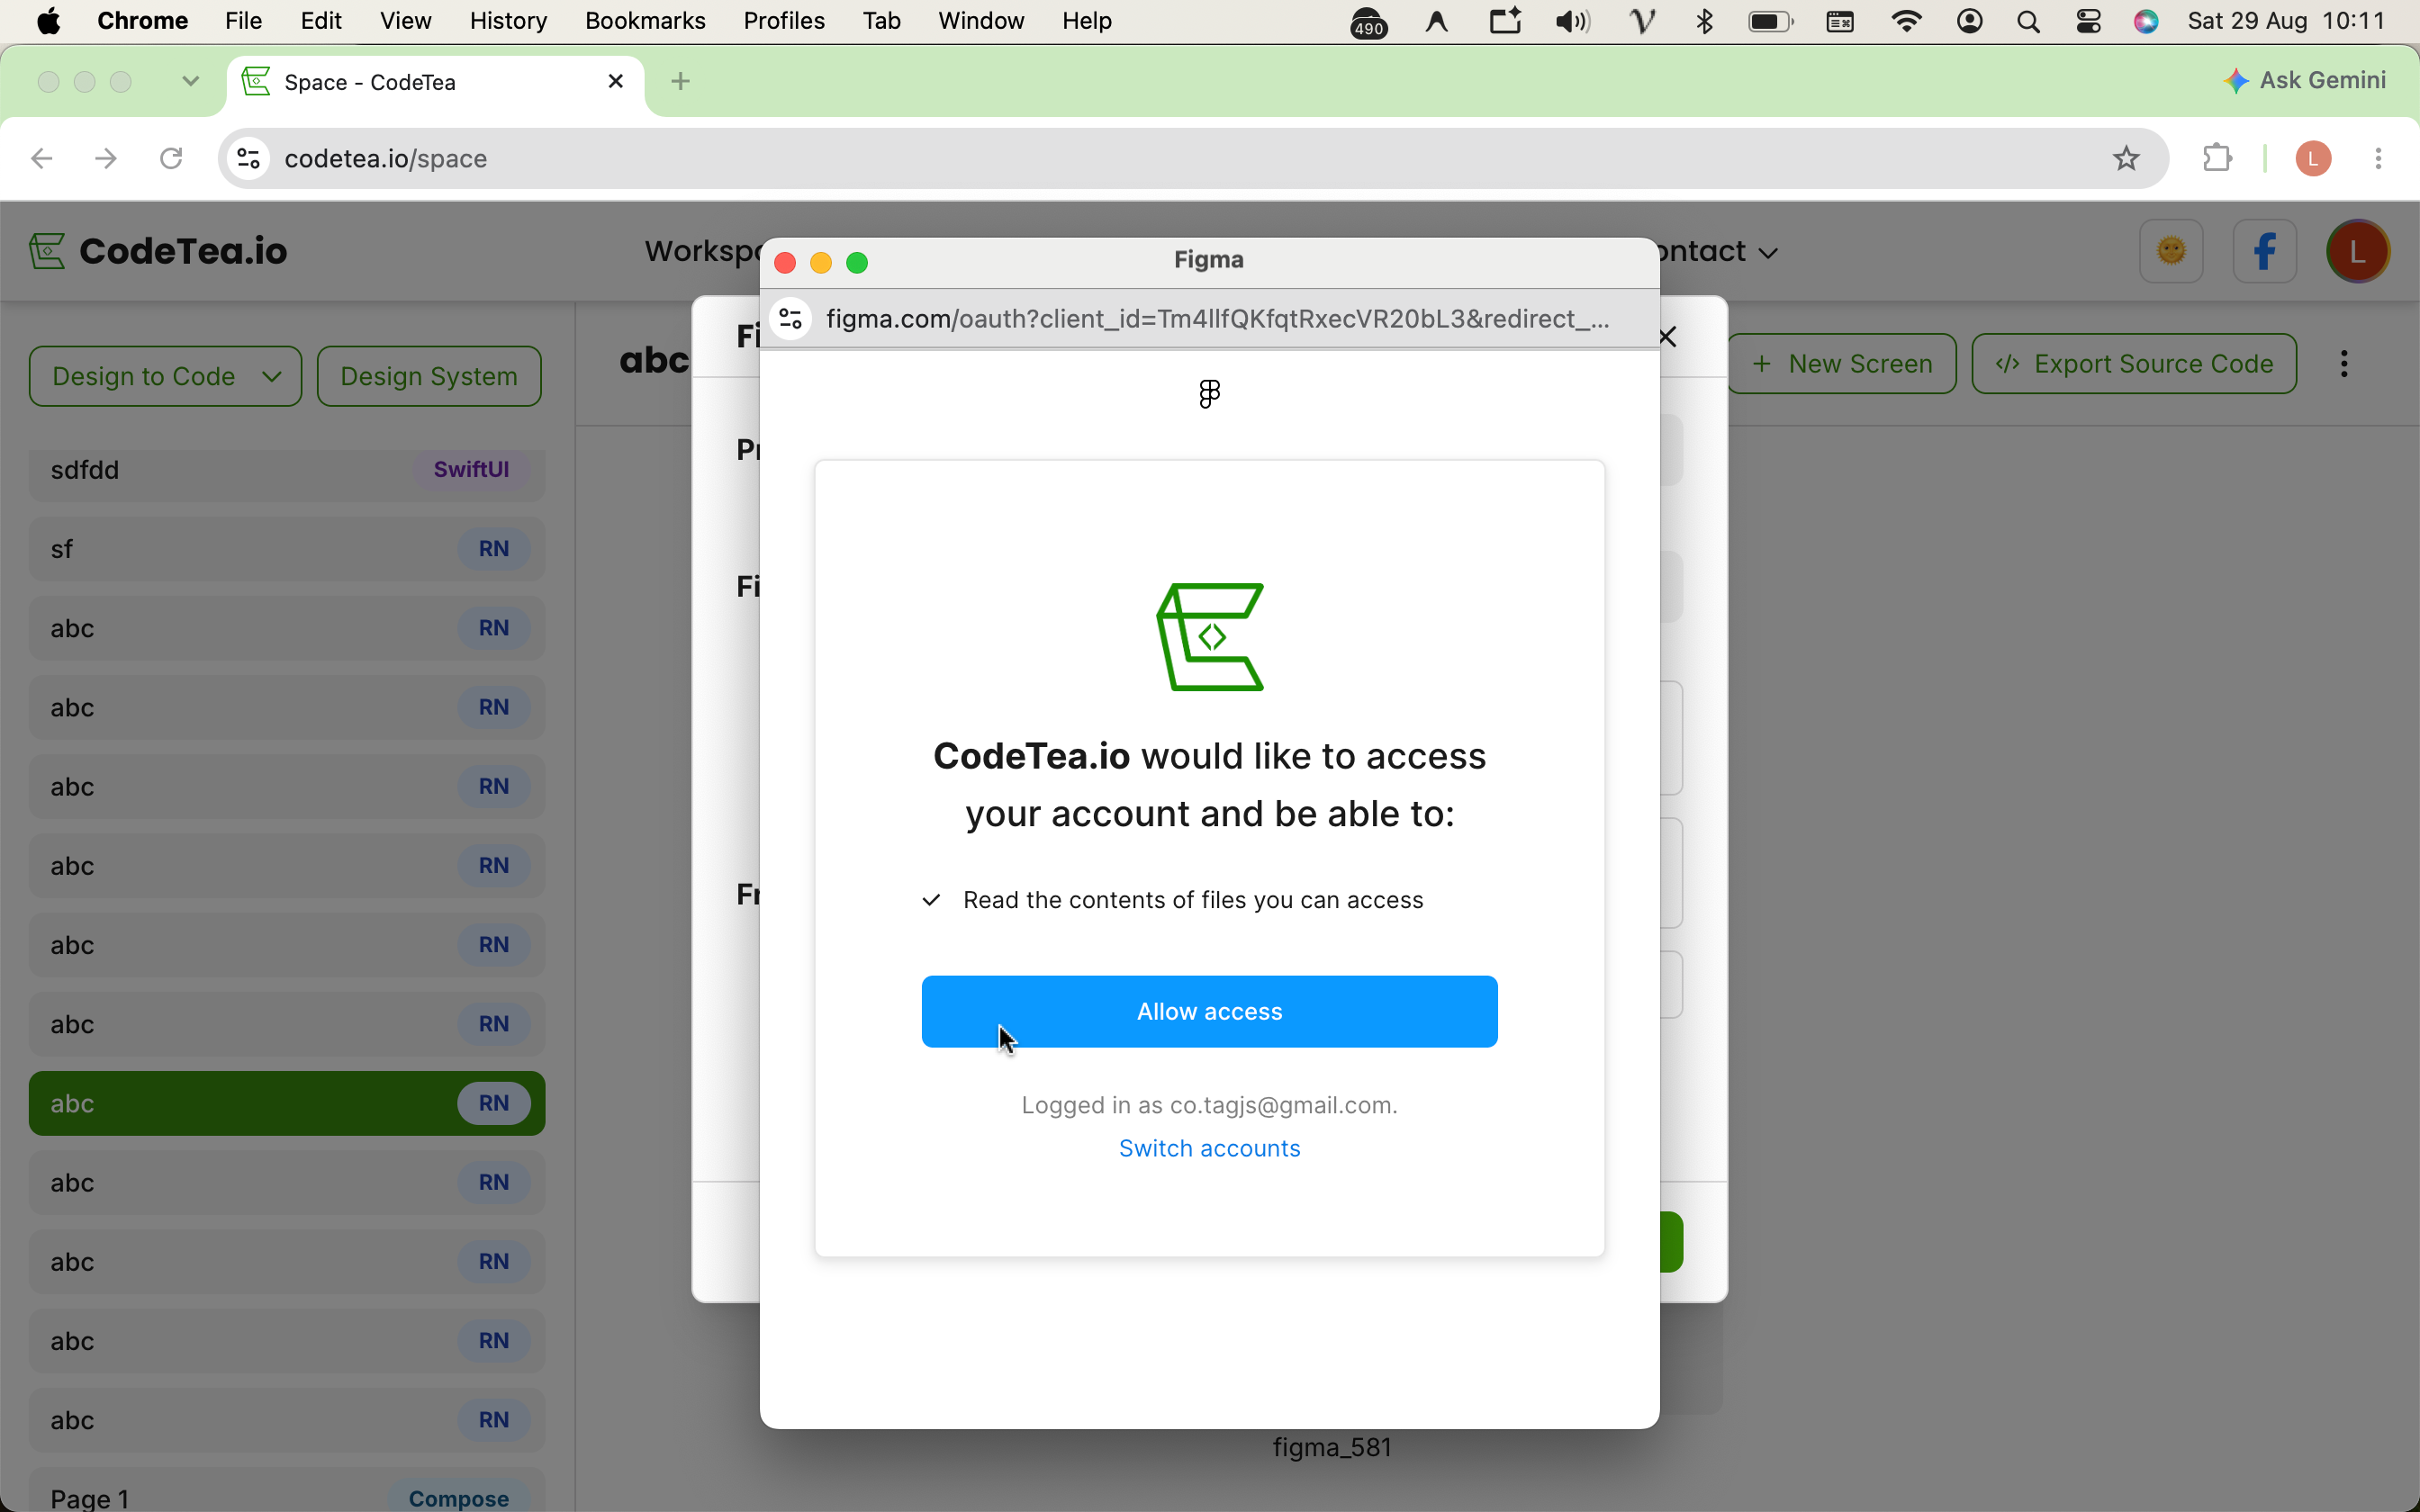
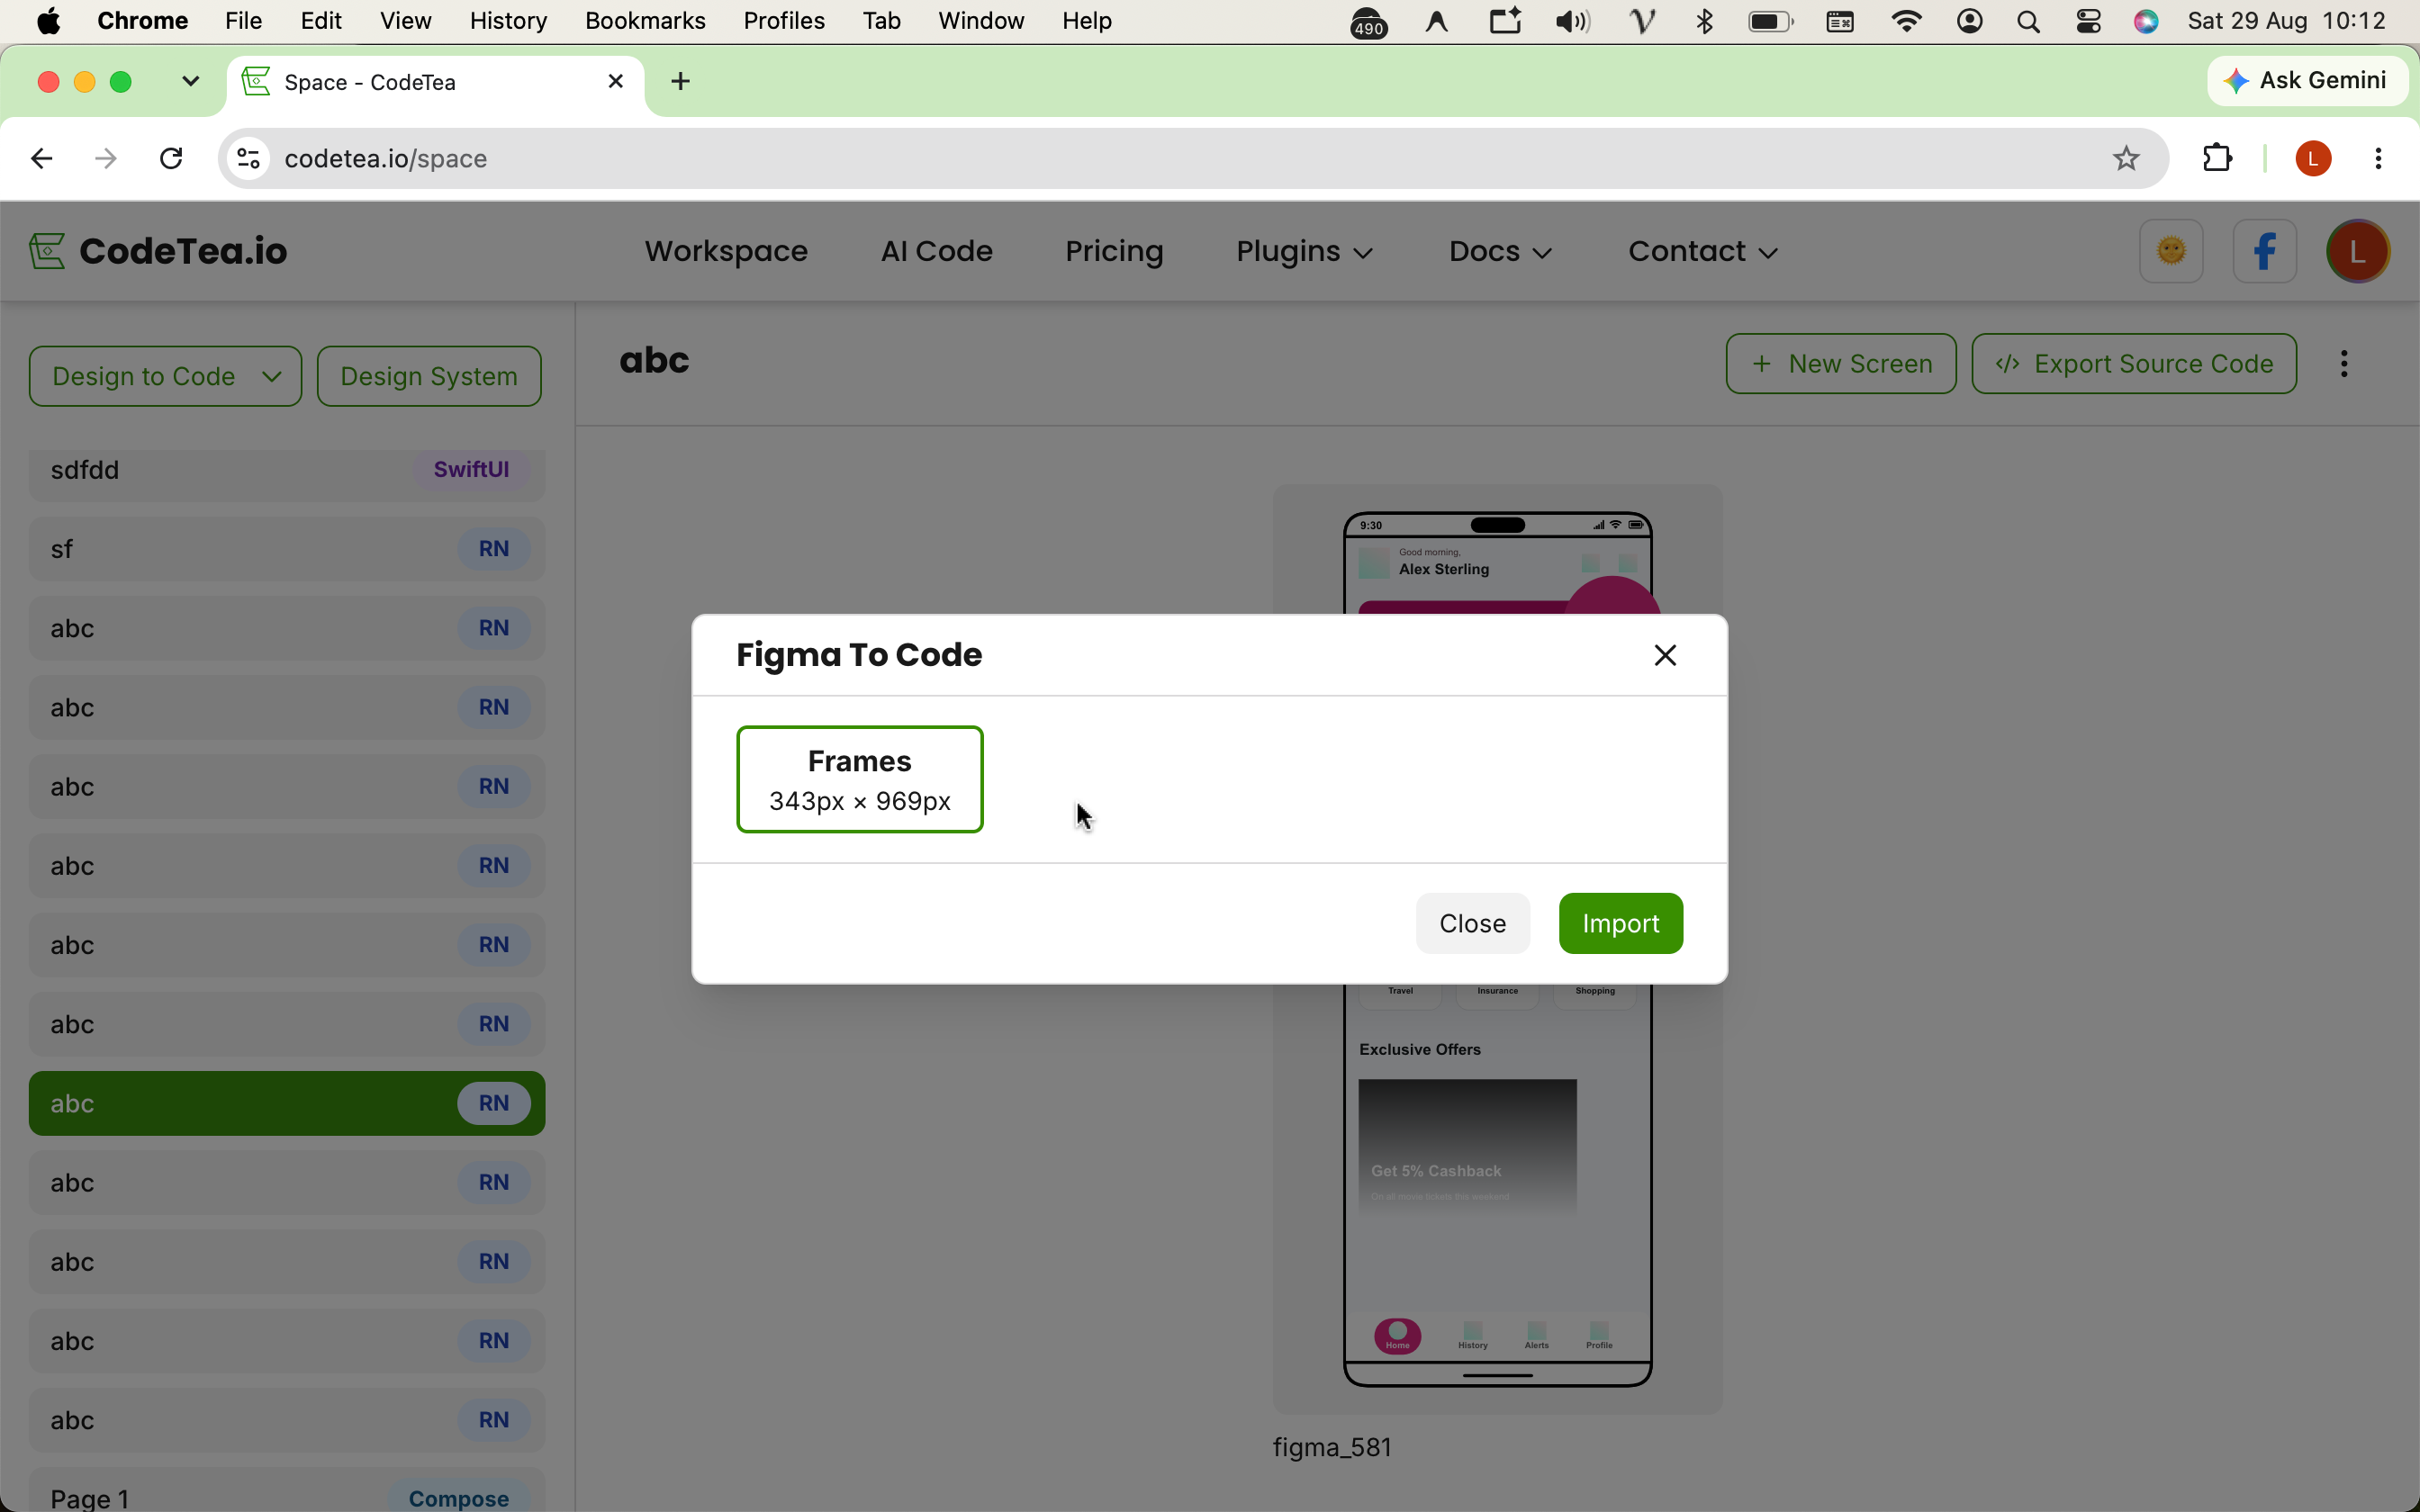
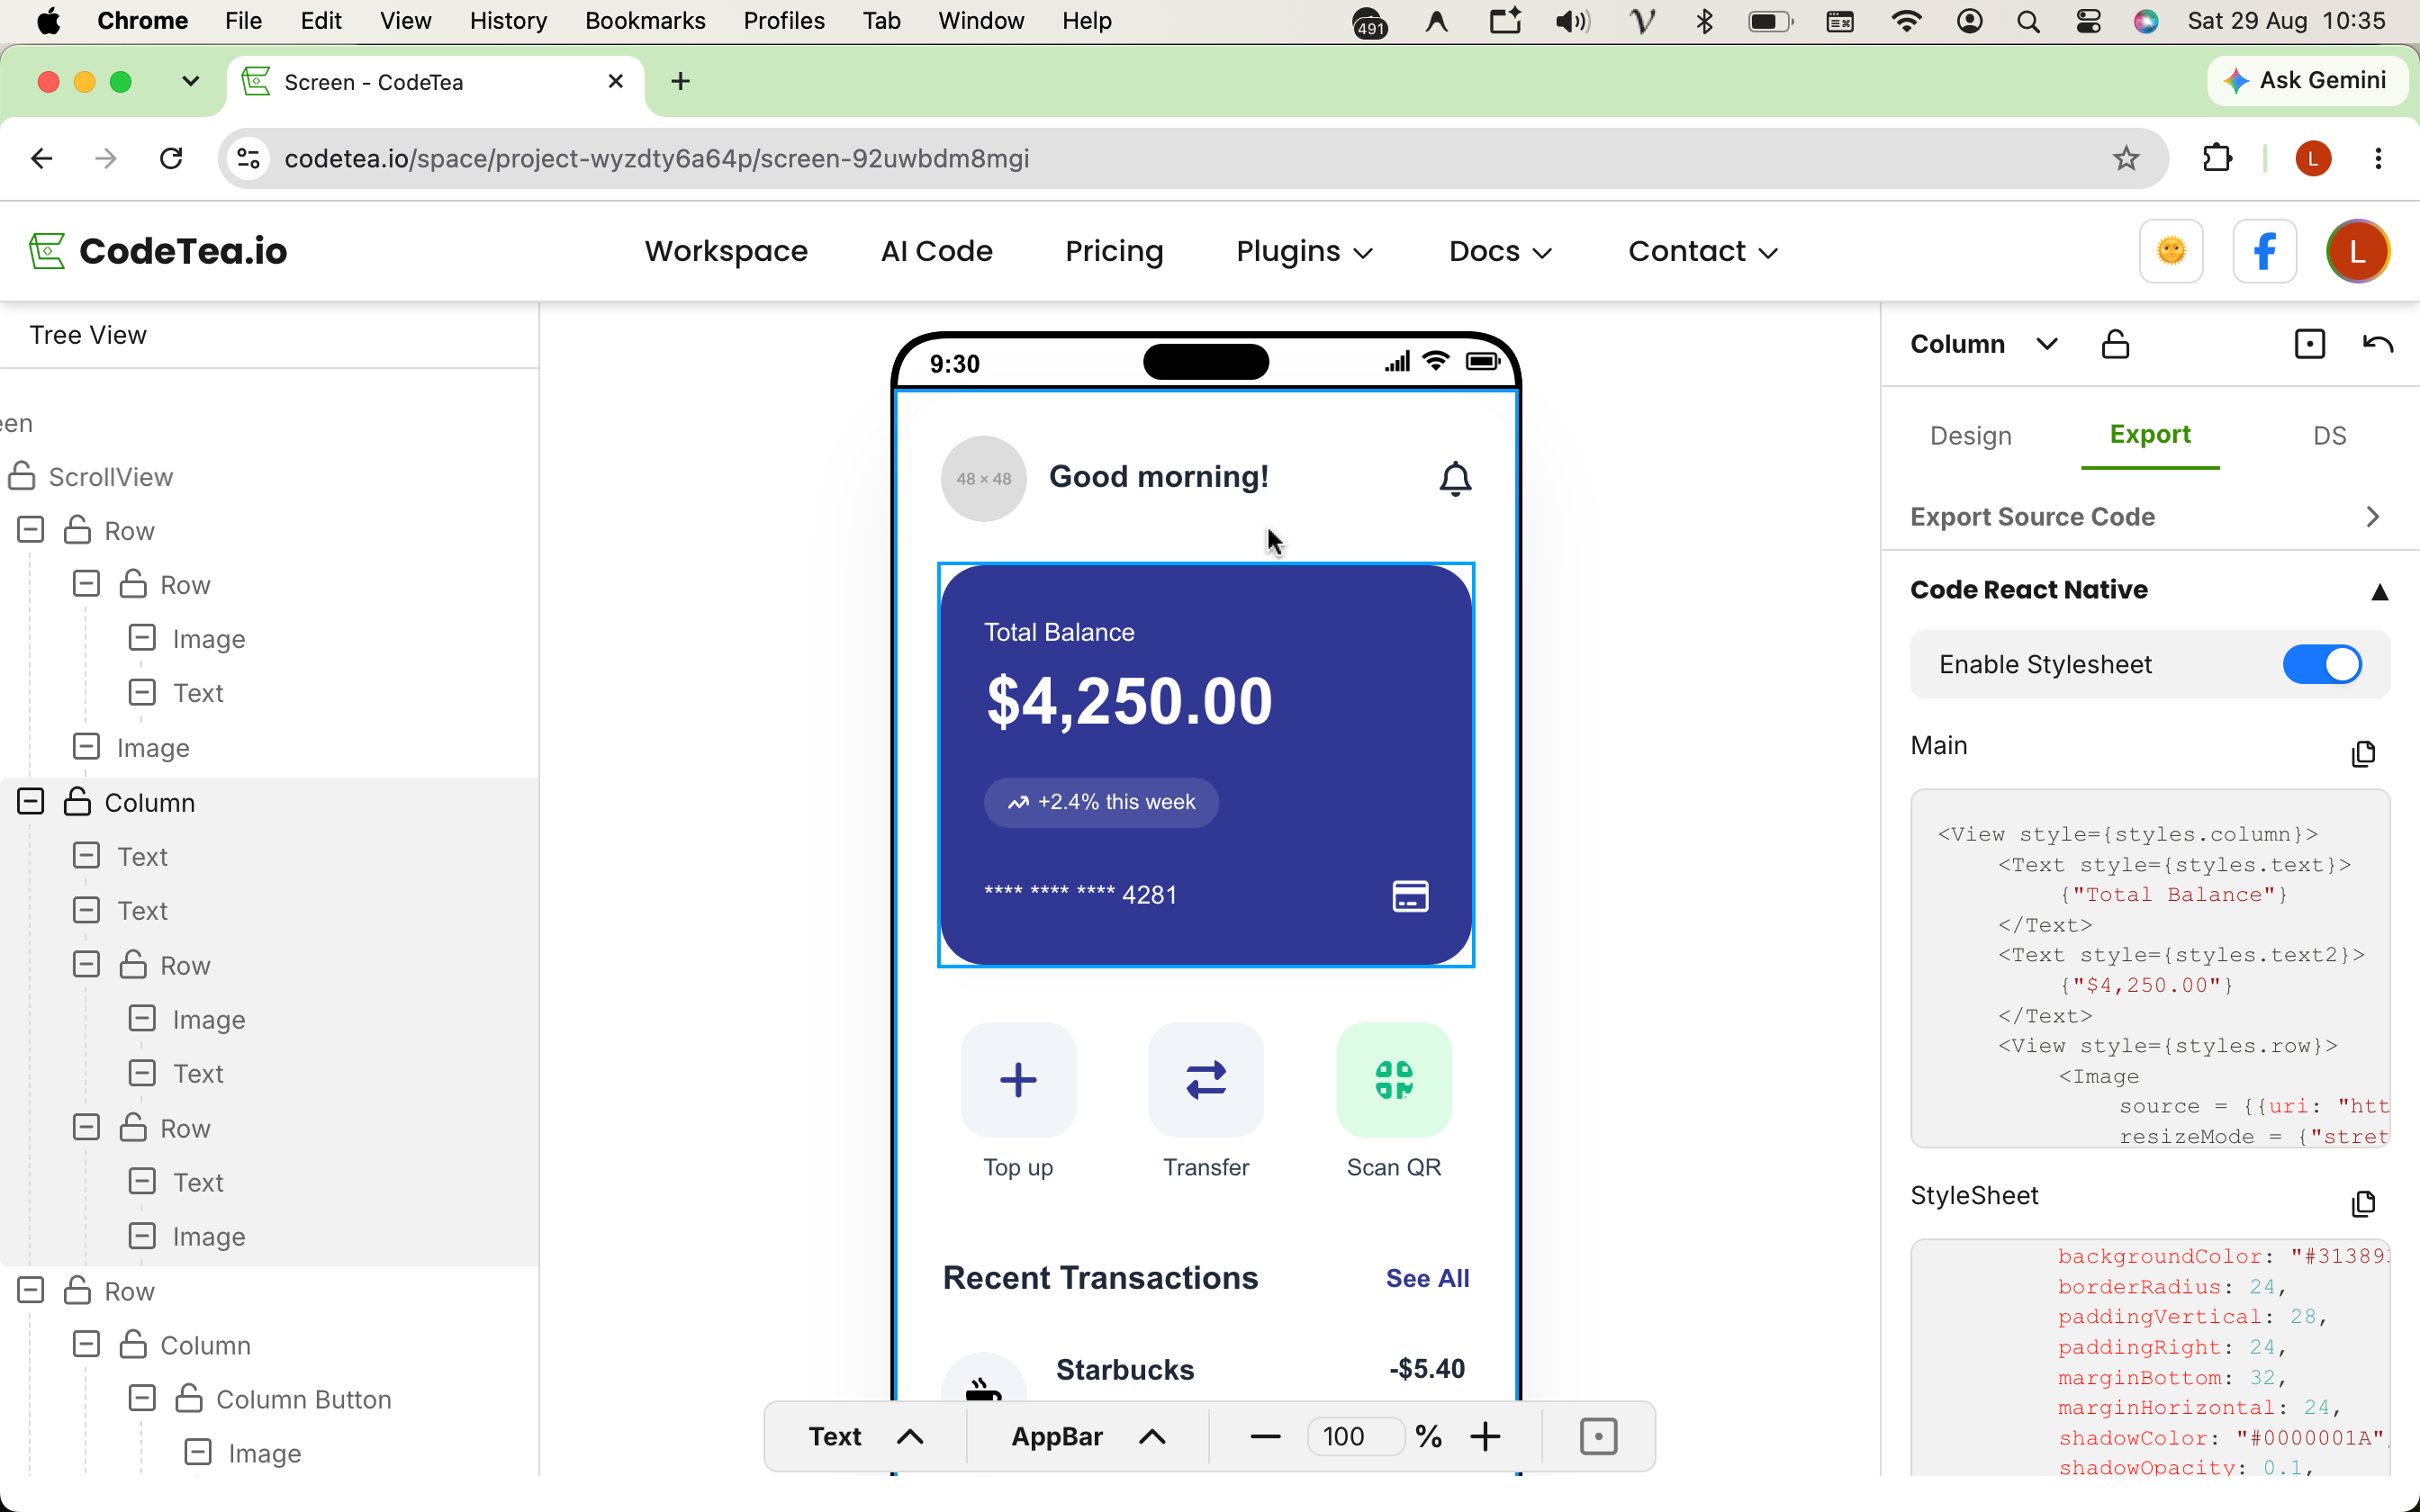
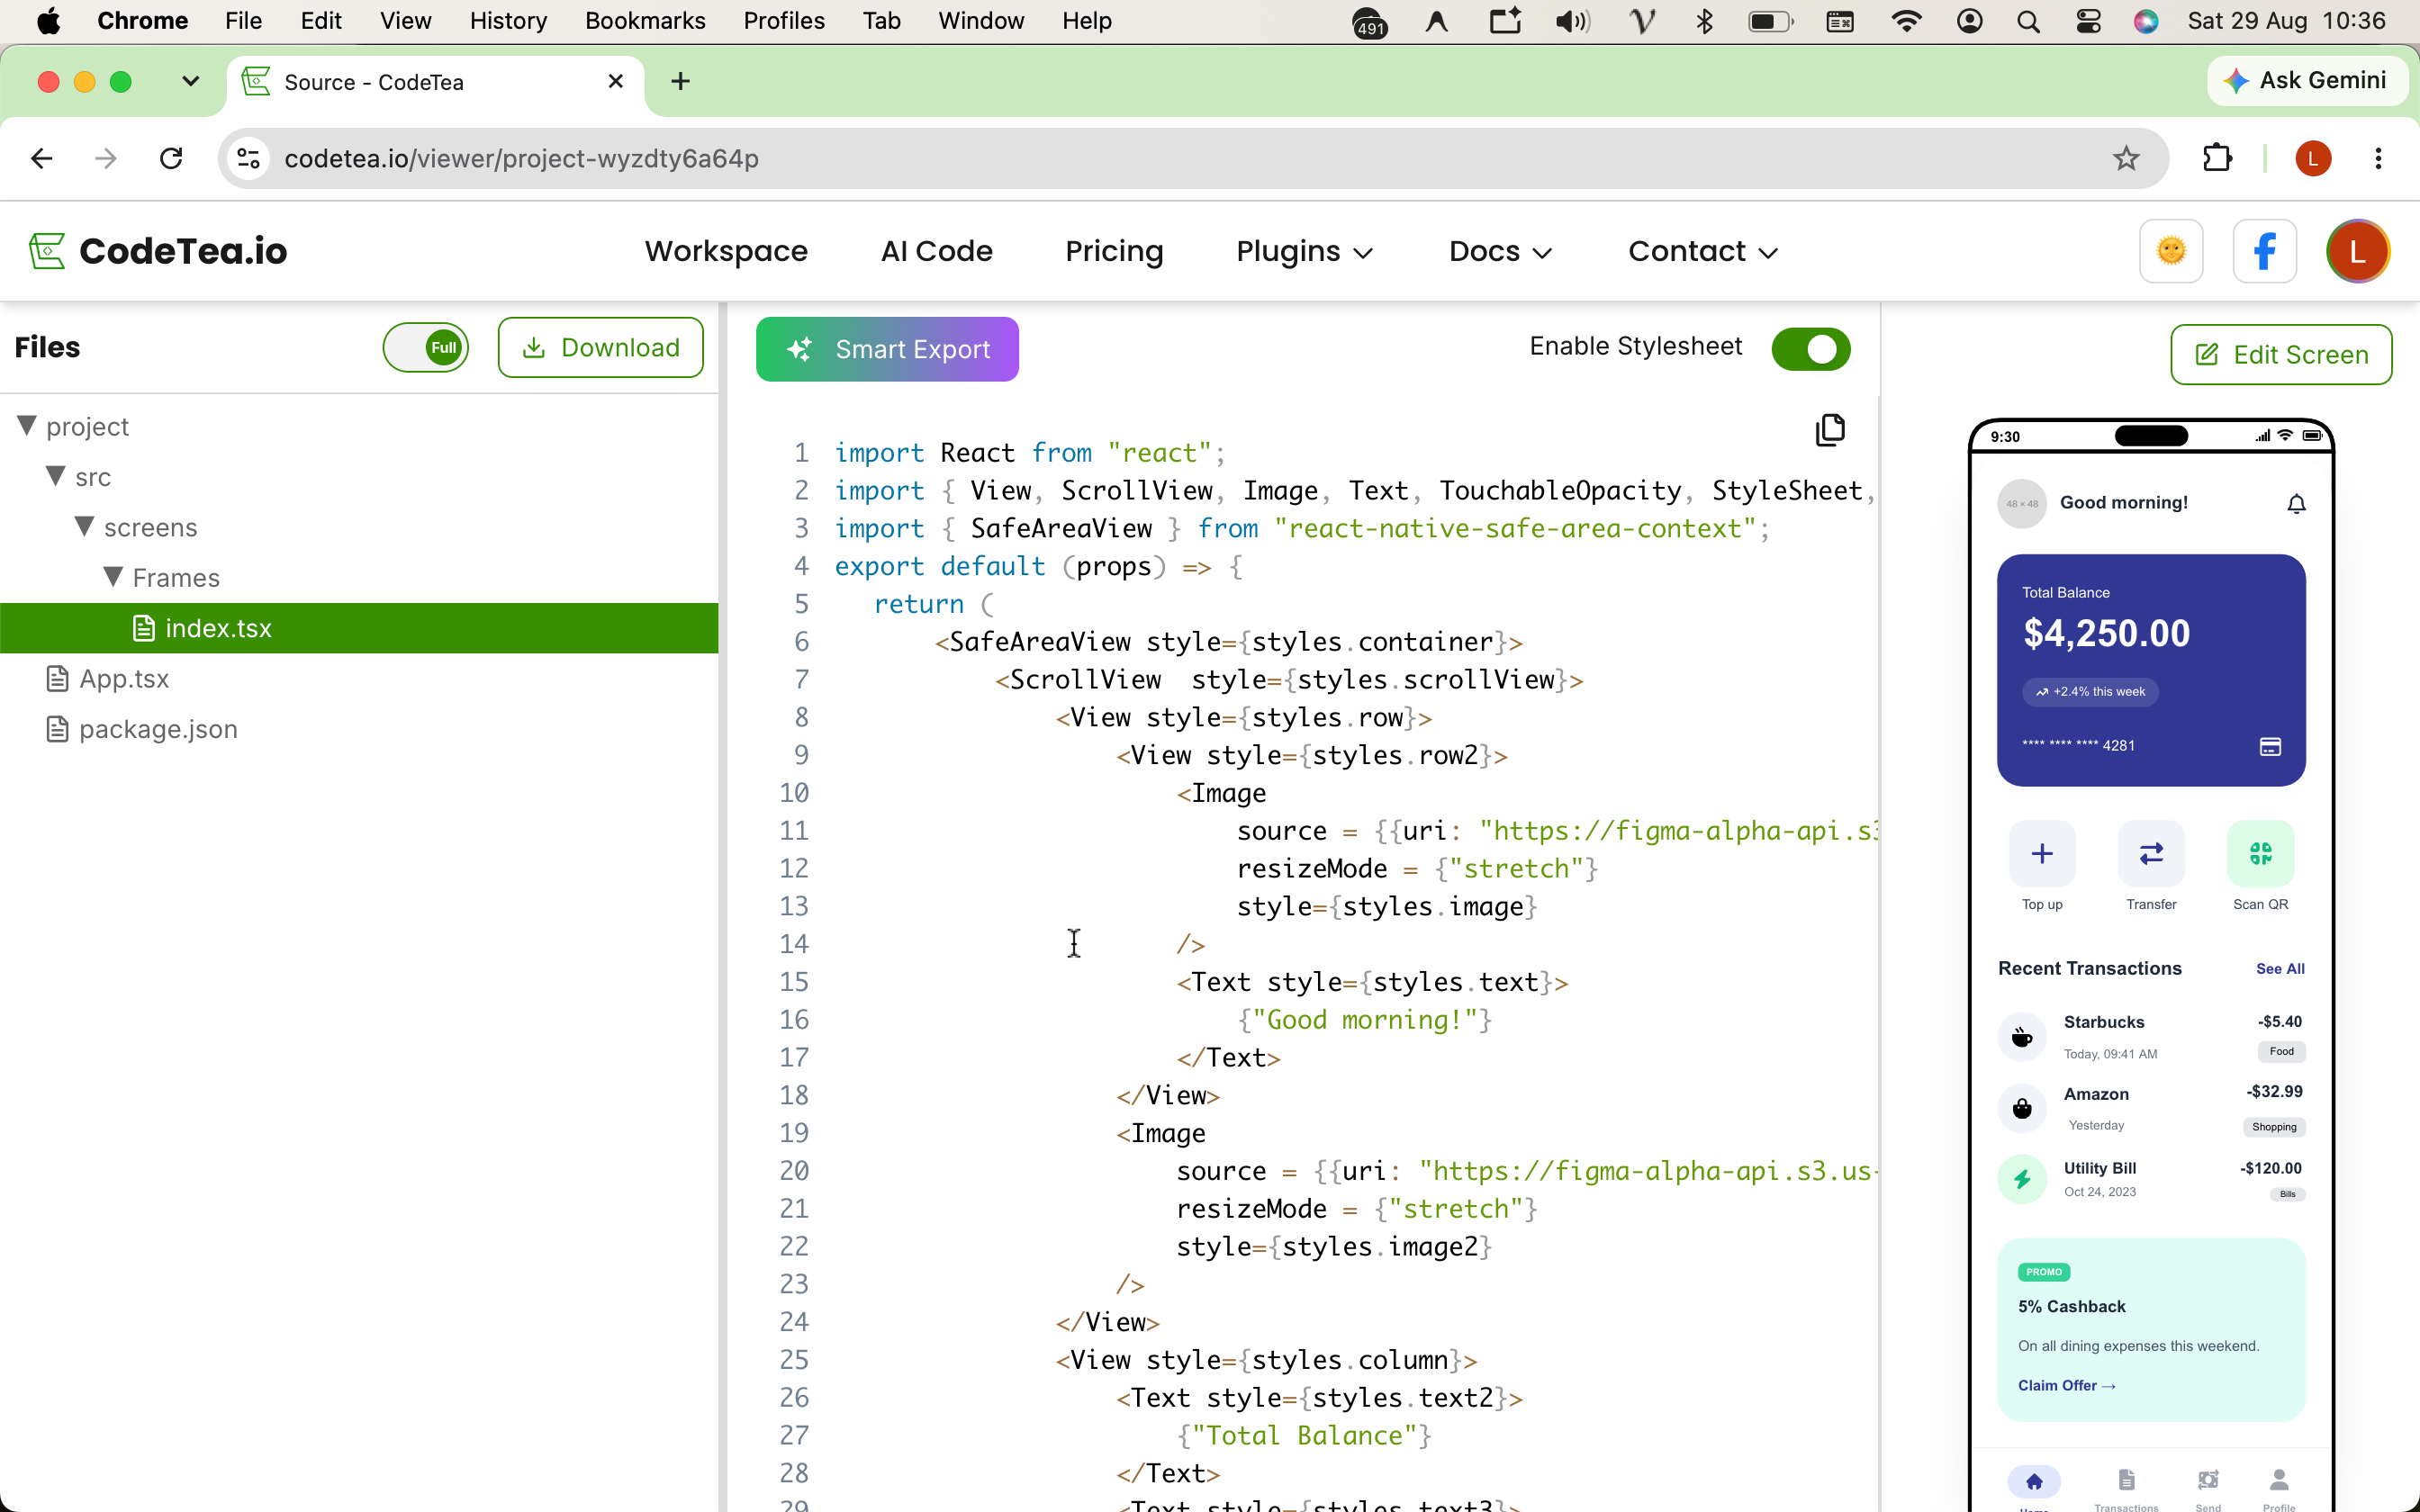
Image guide: enter project name, Figma URL, select React Native framework, and click fetch.
- Step 1: Project Initialization: Enter your Figma file URL into the system, select React Native as the target Framework, and click Fetch to begin the Figma to React Native conversion.
- Step 2: Grant Permissions: Securely authorize the system to read the Figma file so the AI can accurately analyze the design structure.
- Step 3: Select Screen to Export Code: After the system successfully syncs the data, simply select the Frame (screen) you want to export React Native code from.
- Step 4: Inspect Component Code: You can easily click on any small element on the interface (e.g., buttons, info cards) to instantly view the independent React Native code snippet of that component.
- Step 5: Export Entire Screen: The system automatically compiles the entire Frame into complete React Native source code, strictly adhering to the
FlexboxandStyleSheetsystem, ready to copy-paste into your project:
import React from 'react';
import { View, Text, Image, ScrollView, StyleSheet } from 'react-native';

// Automated Figma to React Native conversion result
export const HomeScreen = () => {
    return (
        <ScrollView style={styles.container}>
            <View style={styles.header}>
                <Text style={styles.title}>Home Page</Text>
            </View>
            <View style={styles.content}>
                <Image source={{ uri: 'https://codetea.io/banner.png' }} style={styles.bannerImage} />
                <Text style={styles.description}>Source code adhering to UI/UX standards, responsive support</Text>
            </View>
        </ScrollView>
    );
};

const styles = StyleSheet.create({
    container: {
        flex: 1,
        backgroundColor: '#FFFFFF',
    },
    header: {
        padding: 16,
        paddingTop: 48,
        backgroundColor: '#F8F9FA',
    },
    title: {
        fontSize: 24,
        fontWeight: 'bold',
        color: '#111827',
    },
    // Flexbox layout and other styles accurately translated from Figma...
});
5. Perfect compatibility with Expo and React Native CLI
Whether your project is initialized with npx create-expo-app to speed up development or uses React Native CLI for deep Native Modules intervention, the source code from our tool integrates smoothly. Requiring no heavy custom library installations, the generated code only uses core components like View, Text, Image from the native react-native library.
6. Real-world performance comparison table
| Criteria | Manual Coding | Legacy Auto Plugins | CodeTea |
|---|---|---|---|
| Non-Auto Layout Support | Must calculate manually | Layout breaks | Automatic spatial analysis |
| Code Structure | Depends on Dev skills | Often bloated (Div-soup) | Clean, standard Component splitting |
| Handoff Speed | Measured in hours | 2-3 minutes (requires cleanup) | A few seconds |
7. Frequently Asked Questions (FAQ)
Does this tool automatically renew and charge me?
Absolutely not. One of the biggest barriers of current tools is automatic charging. Our tool does not auto-renew, helping you fully control your payment decisions with transparent costs.
Does the generated source code support responsive multi-screen layouts?
Yes. By accurately translating design attributes into React Native's Flexbox system, your layout will flexibly adapt to any mobile screen size.
Can I customize the code after exporting?
The generated code is Plain React Native. You are free to add logic, integrate APIs (like fetch data), or change class names without any restrictions.
8. Conclusion
Converting Figma to React Native is becoming increasingly easier thanks to modern support tools. Whether you write code by hand or use code-generation plugins, building a solid foundation and adhering to design rules is always the key to success.
Want to optimize your UI programming time?
Stop wasting time on manual slicing. Start importing your Figma designs directly into pristine React Native code today.